Everything You Ever Wanted to Know About Creating a View…
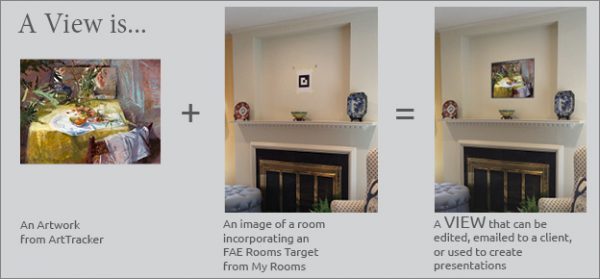
Simply Put, FAE describes a “View” as: An image of a room that incorporates an FAE target, over which an artwork image from ArtTracker, FAE’s favorites list, appears in proper scale and perspective.

As discussed in the previous blog post, Will It Work In My Space, the FAE iOS iPhone and iPad App using Augmented Reality technology can efficiently help determine if an artwork from the FAE website will physically and visually fit into a client’s space. This, along with its ability to be shared and saved in My Views makes it a powerful tool. However, the View that is created directly in the Mobile App will not be editable.

Although FAE’s Mobile App has the ability to wow, it is FAE’s Desktop App that sets us apart from any other fine art sourcing website. Instead of using the Mobile App’s Live View Target, the Desktop App’s Rooms Target is different. Also, unlike the Mobile App that merges the artwork and room images within the iOS device before it is automatically uploaded to My Views on the FAE website, the Desktop version uploads a room image that incorporates a Rooms Target to My Rooms on the website where they can then be merged to create editable Views.
This system enables you to place the Rooms target on any wall where an artwork is desired and then walk around the room taking photographs that incorporate the target. (Please read the For Best Results information that is printed out with the Rooms target before going onsite and taking images) You can either upload each image directly to the website as they are taken or later from your device’s camera roll.
After you have uploaded the room images to My Rooms, they are available for use in creating Views using the View creation page. From there, you are able to drop artwork images from ArtTracker, that automatically maintain their appropriate scale and perspective, over the target in any chosen room.
Once you have decided on an appropriate artwork for a chosen room, you will not only be able to drag the artwork off the Rooms target and drop it anywhere in the image, you will also be able to drag and drop each corner of the artwork separately to manually adjust its perspective to where it has been moved. The site also provides editing tools that enable you to add and change the color of a rudimentary frame, adjust the brightness of both the artwork and the Room, and create and/or attach the View to a Project/s.
The View you have created can be saved and emailed to a client or used to make stunning presentations which will be the subject of a future post.
In addition to a short video on how the Desktop App can help you show your clients exactly what an artwork from the FAE website will look like when it is installed on their wall, without incurring the associated expenses of trying the artwork out in person, below we have provided a detailed overview of the Edit View Page and how it works.
————————————————————
Let’s take a quick tour of how a View is created.
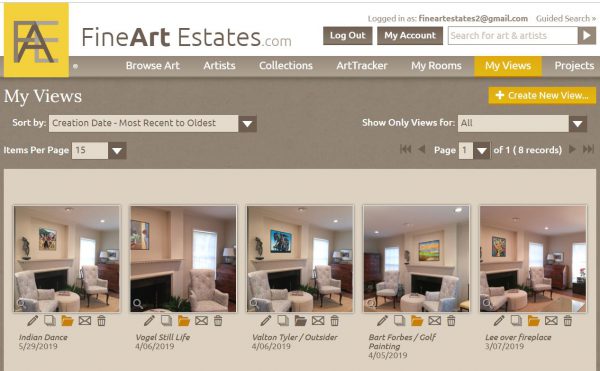
Go to the Main Menu button My Views.

This is where all the Views are stored that you have created. To create a View, Click on + Create New View… at the upper right of the screen.

This will open up the Edit View Page seen below.
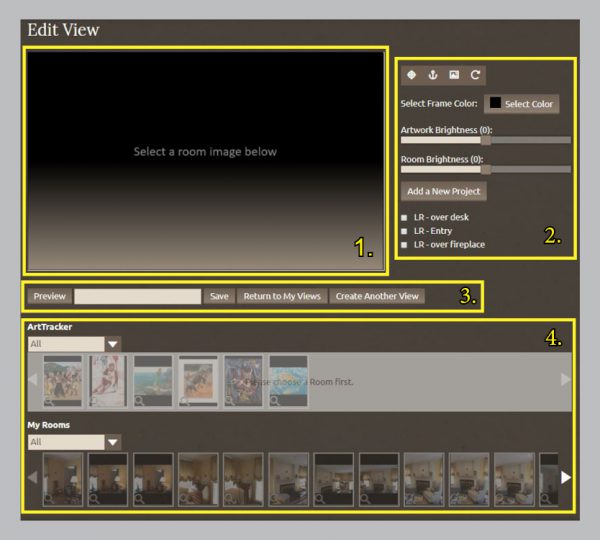
The Edit View page is divided into four sections:
1. View creation screen
2. The View edit and Project assignment console
3. View naming and command buttons
4. Project filtered film strips of Artworks and Rooms
No 1. The View Creation Screen

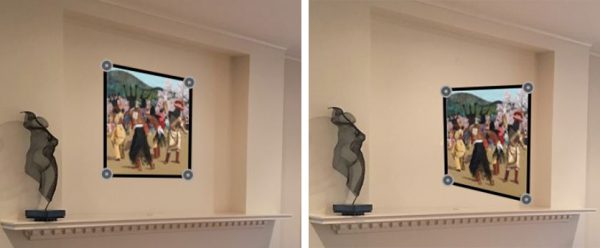
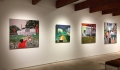
This is where images from My Rooms and artwork images from ArtTracker are merged. When an artwork and a room image are selected, the artwork image will appear over the target in the room image with a black frame around it and round anchors on each corner.
- The anchors can be removed using the Anchor button on the icon bar at the top of the View Edit console.
- An artwork image can be dragged and dropped anywhere on the View Edit screen. (demonstrated in upper right image)
- By grabbing an anchor on a corner of any artwork image or the corner of the image itself if the anchors are turned off, it can be dragged and dropped to manually adjust the artworks perspective in relation to the wall it is on if needed. (demonstrated in upper right image)
No 2. The View Edit and Project Assignment Console
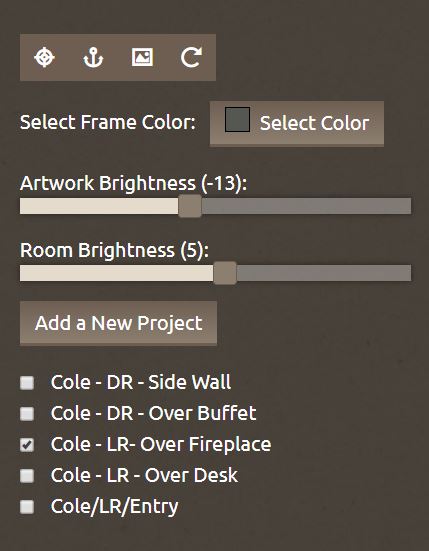
This is where the artwork adjustments are made:
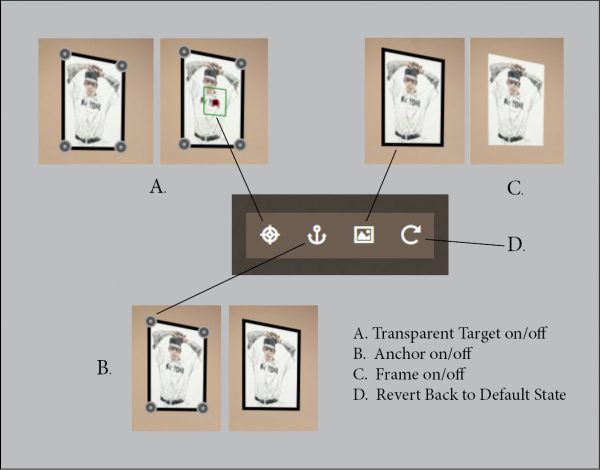
• The icon bar
A. Shows center of target through artwork image on/off button
B. Corner anchor off/on button
C. Removes the frame around image button off/on
D. Return console to default state

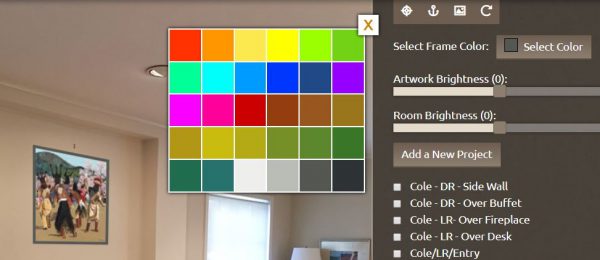
• Select Color frame button
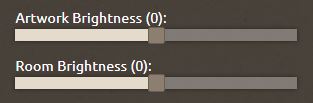
• Adjusts artwork image brightness
• Adjusts room image brightness
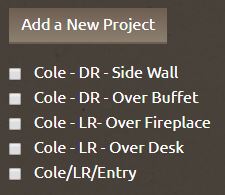
• Add a New Project Button
• Available Projects to assign or remove from this View.
No 3. View naming and command buttons

• Preview button will show a large image of the view that is being edited in a pop-up window
• White text box to name the View (Mandatory before save)
• Save this View button
• Return to My Views button will return user to the My Views page
• Create Another View will allow a user to create a new view after saving without returning to the My Views page first.
No 4. Project filtered film strips of Artworks from ArtTracker and Rooms from My Rooms
(User must first choose a room before artworks are available)
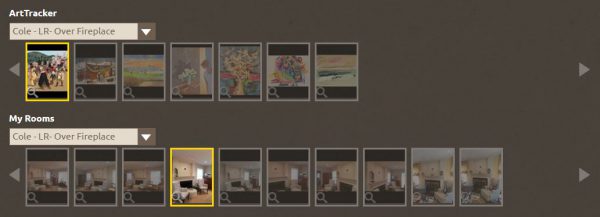
• ArtTracker film strip with all available images. Can be filtered by Project like in example above.
• My Rooms film strip with all available rooms. Can be filtered by Project like in example above.
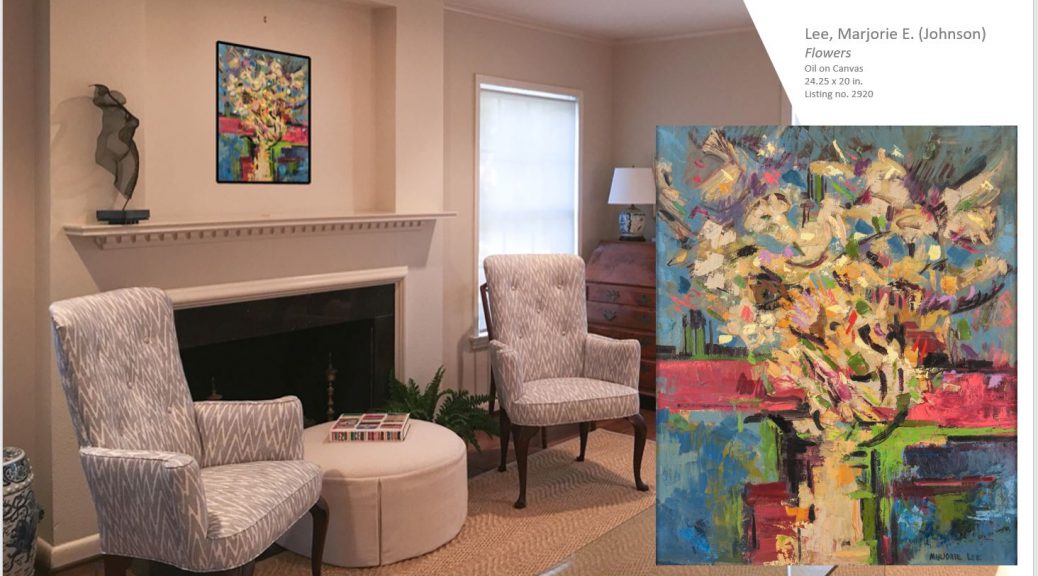
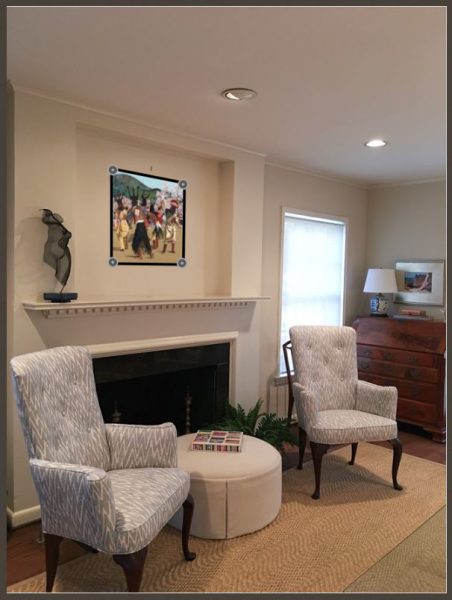
After a View is saved, it can be found in My Views. Each newly created View thumbnail will look similar to the one below. You can add or remove the view from Projects by clicking on the file folder icon or email the view using the letter icon. Although artworks can be shared in many ways, for privacy reasons, Views can only be emailed.
![]()
*****
To see all available FAE Design Blog Posts, jump to the Design Blog Table of Contents.
To see all available FAE Collector Blog Posts, jump to the Collector Blog Table of Contents.
Sign up with FAE to receive our newsletter, and never miss a new blog post or update!
Browse fine artworks available to purchase on FAE. Follow us on Facebook, Instagram, or Twitter to stay updated about FAE and new blog posts.
For comments about this blog or suggestions for a future post, contact Kevin at [email protected].
Other FAE informational posts you may find helpful:
Fine Art Insurance 101
 Practical Tips for Safely Transporting Artwork
 Temporarily Storing Artwork: A Case Study
 Four Artwork Storage Solutions
 Hanging and Framing FAQ’s
 Siting Sculpture, Part One: Overview
 Siting Sculpture: Part Two, A Case Study
 The Importance of a Proper Frame
 When to Use UV Control Glazing
 Reflection on the Problem of Reflections