As a service provided by FAE, the following informational posts cover a series of art related subjects, designed to demystify working with fine art, and tips on how best to use the FAE Website. The FAE Design Blog table of Contents has been divided into the following categories:
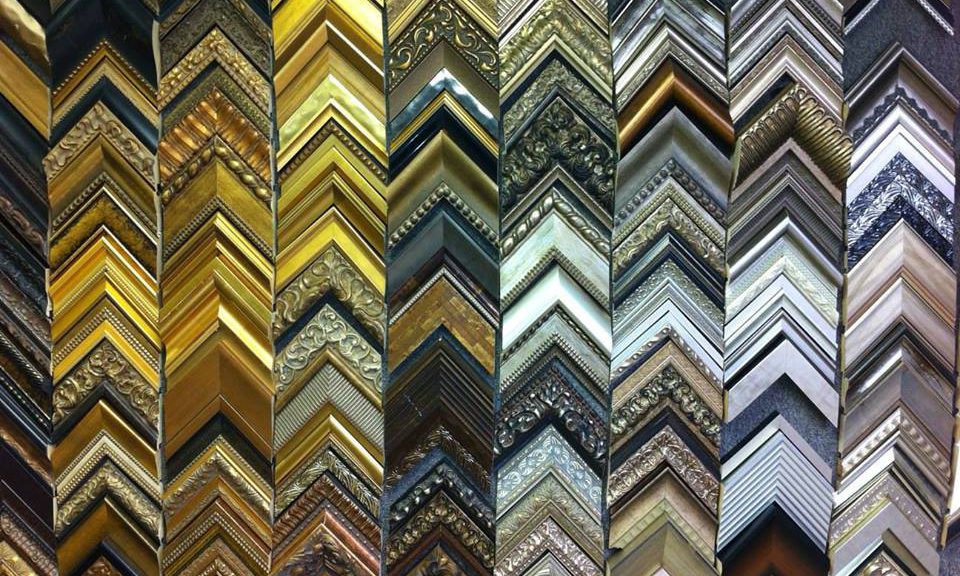
Please do not underestimate the importance of a proper frame for your painting or fine print. Framing is an important design decision that can either enhance or diminish your art viewing experience. The framing decisions you make will not only affect the look of the artwork and the environment into which it will be placed, but its long-term well being as well.
Without a frame to keep this image contained, the compositional elements that make up this image seem to fly out of the picture plane.This frame visually refocuses the viewer’s attention to the sunflowers, that make up the central part of the composition, making the painting feel far less chaotic.
How the artwork will be used can inform frame choice. If it is framed for a collection or museum – because it will most likely be moved from place to place over time – the most important consideration is that the frame compliments, enhances and protects the artwork. If it is to be installed in a commercial setting where it is most likely permanently placed, in addition to helping to enhance and protect the artwork, it needs to fit in with the overall design of the room.
Installation of Modernist paintings at the Philadelphia Museum. Because these works will be moved to different locations over time, each frame is designed to fit the painting rather than the specific space.These three paintings in a corporate collection are framed to fit the art as well as the space because they will not be moved like they would in a private or museum collection.
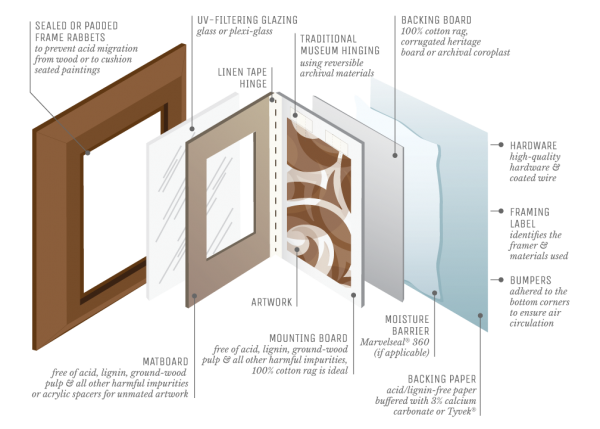
For your artwork to have the best chance of retaining its value, it is best to be sure that the frame shop you have chosen practices archival framing techniques. Essentially, Archival or Conservation framing means that anything used in the framing of an artwork will not damage the artwork over the long term and will, in most cases, help to protect it. This is most important with works on paper.
This Georgian Bay Art Conservation exploded view shows proper archival framing of an artwork on paper. This would be the standard suggested method of framing a cherished work on paper.
How to find a good Framer?
If you are working with a designer, they will most likely have several framers they regularly work with to recommend for your specific need. If you are not working with a designer, and you feel uncomfortable making this type of decision yourself, a good frame shop will normally have an experienced person on staff who can assist you in making good framing decisions.
One of the best ways to find a good framer is to contact several art galleries around your area that do not have framing departments and ask them who the best conservation framers are in the area. Although conservation framing is more expensive, the extra expense will pay off down the road.
You will not know if you have found a frame shop that uses archival materials unless you ask the right questions. The first question you ask should be, “Do you provide framing to the most current archival standards?”
How to help the framer help you get the most suitable frame?
For a framer to be most effective at suggesting proper frame designs for your artwork, it is best to not only take the artwork to the meeting, but to also take:
• Photos of the entire room in which the artwork will reside
• Measurements of the wall onto which the artwork is to be hung
• Information and visuals on how the artwork will be lit.
And if the artwork is to be hung over a sofa, a chest, or a fireplace mantle:
• Be sure to provide the height of the object the artwork is to be placed above
• Provide the height of the wall above the object to the ceiling molding above.
Following are a few things you may want to avoid or at least think about when choosing a frame for your artwork. I was going to call this section “Framing Don’ts” but as with just about every rule in this world, there are always exceptions.
Over-framing:
Over-framing can relate to the disproportionately large size of a frame to the artwork it surrounds, or the inappropriate ornateness or finish of the frame related to the period, style, and subject of the artwork. Sometimes, to make a small artwork appear more significant looking, a much larger frame (or mat-and-frame combination) is employed, sometimes to the point of totally overpowering the artwork. I have seen this technique used often on late impressions of Rembrandt etchings. To make them more important looking, a small etching is surrounded by a complex frame, often 10 to 20 times the size of the actual etching.
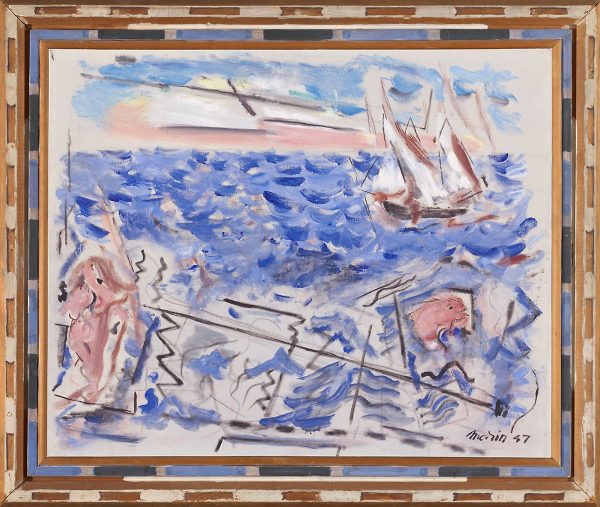
Although the frame above and below are both beautiful frames, both overpower and upstage the artworks themselves and I would consider both of these works to be over-framed. The one above might have worked if the gold had been toned down and not so shiny. The bright gold and frenetic ornamentation makes the artwork inside seem insignificant and hard to look at. The artwork below works well in coloration with the portrait within, but again, its design is so frenetic, the eye is drawn away from the painting. A frame should never take away from an artwork, it should only compliment it.
Here is the same portrait as above in an appropriate period frame. It beautifully compliments the painting and after seeing it, you can’t imagine another frame could be better for the painting.
Under-framing
Under-framing is when an artwork is not provided the frame it deserves. For financial and sometimes practical reasons, artists who paint in oil and acrylic on canvas will either not frame or put strip molding around the artwork to protect the artwork’s edges, assuming that the person who buys the painting will frame the work to their own specifications. Some galleries will not frame any of the work they have for sale of this type for that same reason.
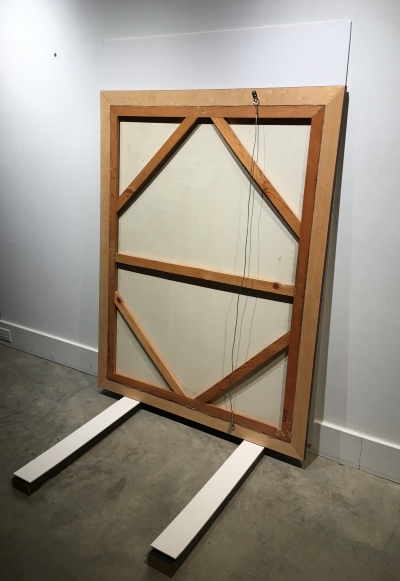
The late Constructivist work, pictured above, would not look right on most walls without something around it to contain its chaotic line work. In this case, under-framed is no frame at all. Even a thin strip molding or a simple wood float, as seen below, will contain the line work and improve its overall appearance.
The 50/50 rule
This rule pertains to the width of two-part frame assemblies, that is, a liner to its frame or a mat to its frame. The rule states that both these elements should never be perceptively the same width. So, the mat width on a fine print should never be, or look, the same width as the frame that surrounds it. If the mat was there first and it is decided that it is to be kept, the width of the frame that is chosen for the work needs to be significantly smaller or larger to feel right.
This is a good example of why the 50/50 rule is important. Proportionally, the top and bottom relationship of the frame to the mat is on the verge of being to close but is still acceptable, where the left and right relationships appear the same and do not look right. The fact that the mat sizes of the top and the side are different might indicate that the frame was being reused. Normally the mat proportions would be the same all around or a little greater at the bottom. When there is more space at the bottom than the rest of the mat, it is said that the mat is “weighted at the bottom.”In this example, the artwork is floated on the frames back mat creating a visual empty space between the artwork and the frame. It shows a pleasing proportion between the artwork, the mat space, and the wide frame. Like above, this is an example of an artwork being used in a preexisting frame evidenced by the larger spaces at the top and bottom than at the left and right of the artwork.Here is the most common proper proportion for a matted work on paper. The frame is substantial enough to support the frame assembly and there is an amount of space between the artwork and the frame that makes the artwork look significant. If you doubled the amount of mat space all around, it would appear less significant and over-framed.
Formal/Informal
In most cases, like clothes, it is usually appropriate to dress an artwork to fit the room in which it is to be sited. This means the room will often dictate the type of frames that will be appropriate to choose for that space. It is normally inappropriate to put a driftwood frame above a Louis XV gilded commode in a period room.
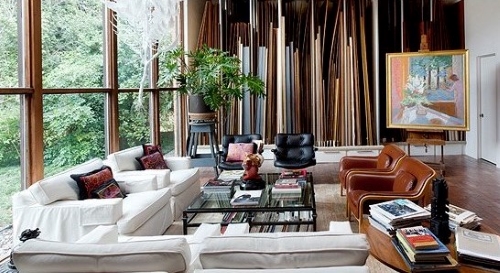
If one is not a collector and the artworks are to remain in the room they are in for an extended period, the frames on the artworks should feel comfortable in the space. Above is a very formal living room and below is a very informal one. As you can see, the frames on the paintings would feel totally out of place if they were switched around.
Keep original frames
Frame styles change with the fashion and period in which the artwork was created. Sometimes the original frame on an artwork does not fit a contemporary space so it is decided that the frame needs to be changed. Separating a period frame from an older artwork can actually reduce the value of the artwork. If it is decided a change of frame is necessary, it is wise to store the original frame so it can be reused later.
There is a lady who owns a major American modernist painting for which the artist personally made and decorated the frame. She personally disliked the frame, so she had the painting re-framed to suit her home and the original is stored at a local art warehouse. The painting is loaned out to museum shows with great regularity and when it is, the art movers take the painting to the warehouse, change out the frame to the artist’s original frame, and send it out to the museum. When it returns, the process is reversed, and the painting is returned to her in the frame she prefers. If she had discarded the frame, she would have thrown away many thousands of dollars in value.
This is an example of a frame that the artist made specifically for this painting. Although it might not fit the taste of the person who owns the painting, it would be a costly mistake to re-frame the artwork and to not keep the original as it would actually devalue the artwork.
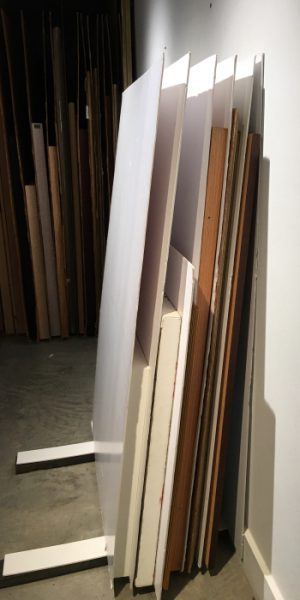
Designing a place to store the parts of your collection that you do not currently have on display is not as difficult as it may sound. One can either procure off site storage at a bonded fine art storage facility, or make space at home by assessing the dimensional space the art will take up that is currently resting and building rack spaces that are designed to safely accommodate it, taking into account your future needs.
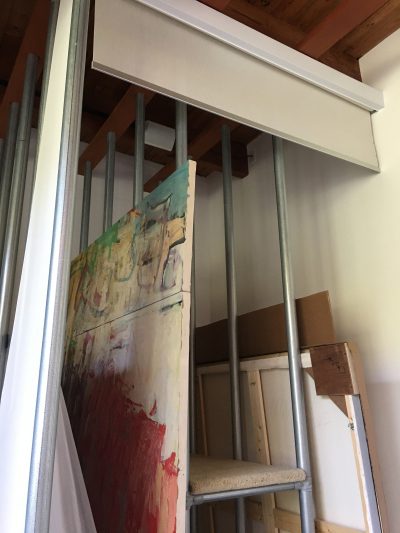
Artist’s studio converted into a living space but adding large painting storage as a design element.
Rather than provide a “do this for this situation” scenario, I thought it better to show the solutions we devised to store art in our home and gallery. These storage solutions have served us well and can be adapted to fit most any circumstance. They range from a large painting storage built into a living space and a framed works on paper storage in a closet in our home, to public and behind the scenes storage in our gallery.
Cheryl Vogel providing scale to the room.
Visible Large Painting Storage:
We had more large paintings than we had room for in the gallery, so we built large painting storage at the end of a room that was originally an artist studio. The storage had to be functional and a decorative element in the space. It also had to be easily removable if we decided not to store works there in the future.
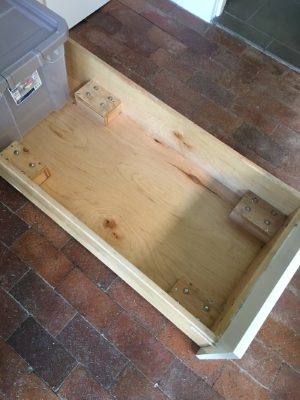
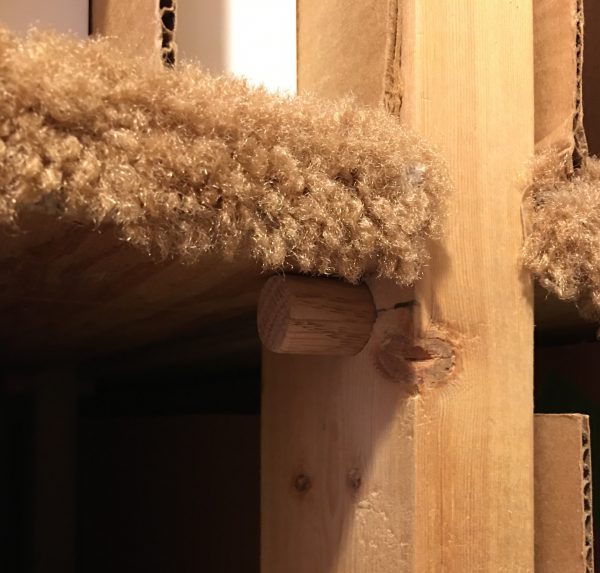
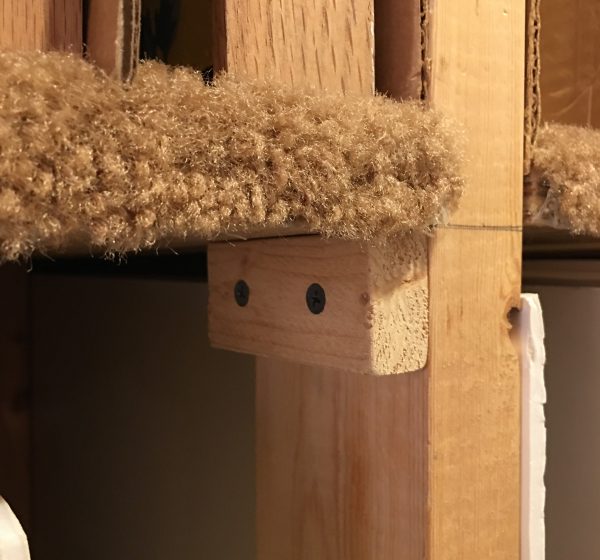
Images showing details of plinth, vertical supports and attachment points
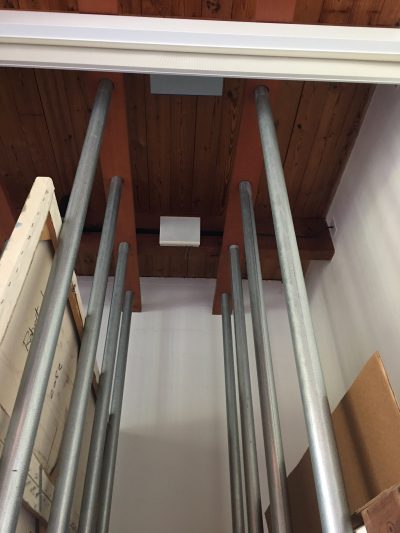
Since our house is in a flood zone, we created a plinth to put the artworks on and designed drawers on rollers that would fit within the body of the plinth, as deep as the plinth itself. The drawers hold plastic tubs for storage. We used 2 5/8 inch galvanized chain link fence posts for the vertical supports and a smaller diameter 1 5/8 inch of the same material to support the shelves.
Full depth plinth drawers roll in and out on recessed wheels for long term storage. Plastic bins keep storage items moisture and bug free.
The plinth was built in individual sections and the vertical support pipes were designed to be easily removed. In fact, if in a hurry, the pipes and plinth can be removed by two people in about two hours. We used carpet on top of the plinth to protect the frames and edges of the artwork. So that we could minimize the visual clutter of the artwork and fluted cardboard separators, we had motorized white scrims added that can hide the artwork from view when wanted.
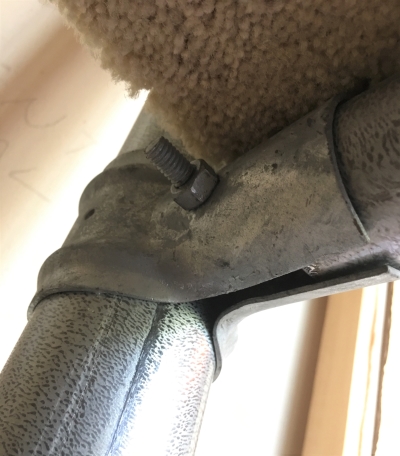
This image shows how a shelf has been added to the rack with a detail of the connector below. The motorized scrim that covers this section of the rack is also visible above, partially deployed.
Built-In Storage in a Walk-In Closet
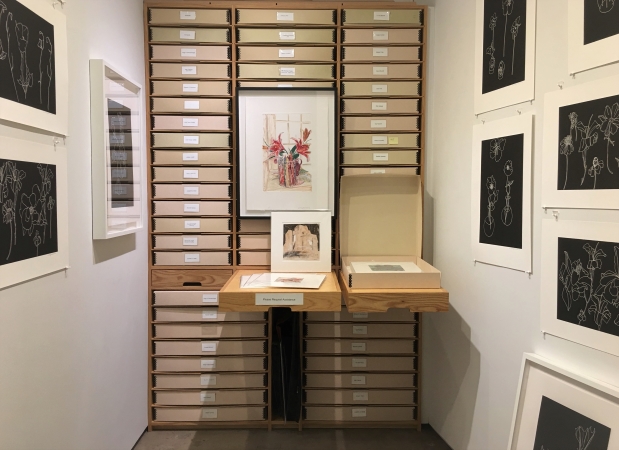
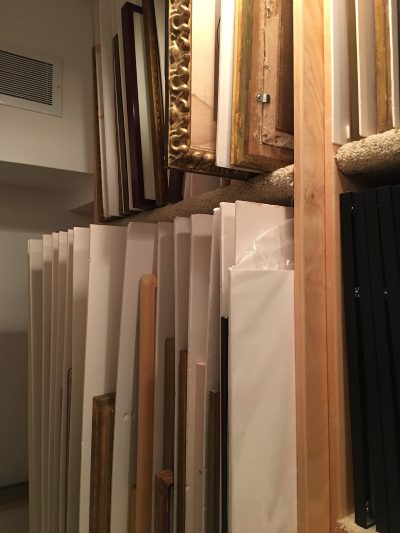
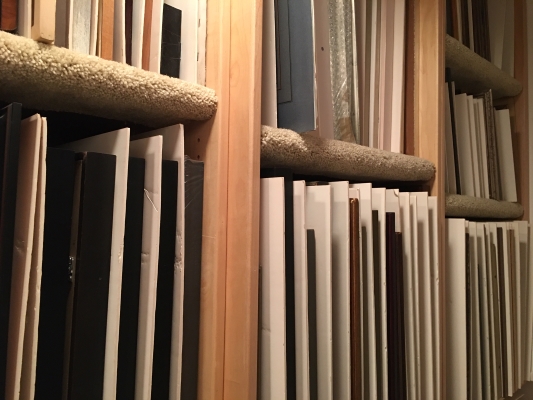
To store a collection of framed small works on paper, we had shelves built into a walk-in closet located in an unused bedroom.
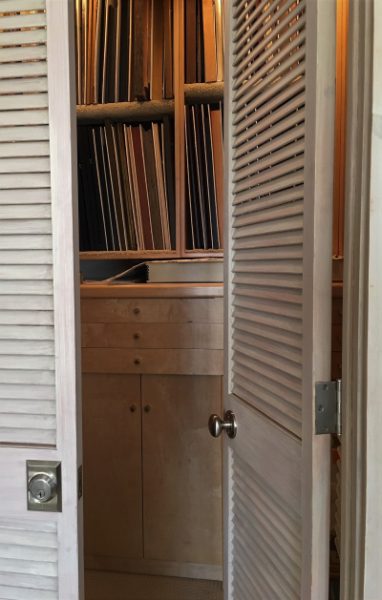
This image shows rack spaces that have been built into a walk-in closet. Two of the three structural boxes that make up the racks were built over a storage cabinet. The louver doors serve as an HVAC return.
Since most of the framed works were small in scale, we did not need extra strong supports. A system of 3/4 inch high grade plywood boxes were built and the sides were drilled so the shelves could be supported with shelf support pegs. To keep the temperature and airflow appropriate for works on paper, we had an HVAC register installed in the closet (shown below) and used louver doors that acts as a return (shown above). Since the house is adequately secure, we were not concerned about security here other than keeping honest people out.
The rack space at the bottom demonstrates how the separators should be cut to protect artworks that are larger than the depth of the rack. The HVAC register seen at the upper left keeps the temperature and humidity within limits and the air moving.
We used foam core separators for this rack space as it is less likely to scuff antique frames than regular cardboard. It does not matter if the artworks extend beyond the front of the end of the shelf, as long as the separators are cut to accommodate the extension and there is enough room opposite the shelf for the artworks to be removed with ease. Make sure that all framed works on paper will fit the rack spaces in their upright configuration, as they should never be stored sideways or upside down.
The carpet is cut pile and the front of each shelf, in this case 3/4 inch plywood, has been rounded so the carpet can be wrapped to form a soft bumper.
Here is where two rack boxes of slightly different depths come together.
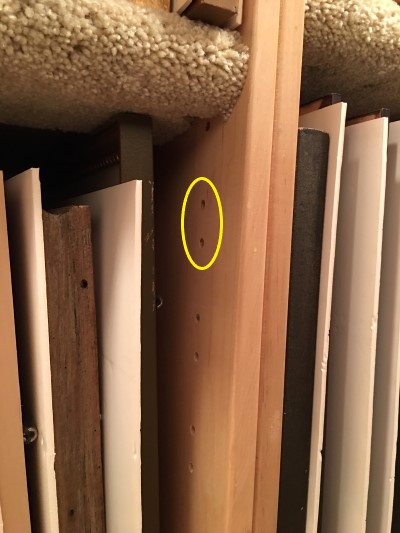
Holes were drilled all around the supports so four shelf support pegs can hold each shelf wherever needed. The holes for the shelf support pegs need to be drilled close to the front edge of the box sides as shown below.
Holes are drilled into the sides of the box for the shelf support pegs.Shelf Support Pegs were used here.
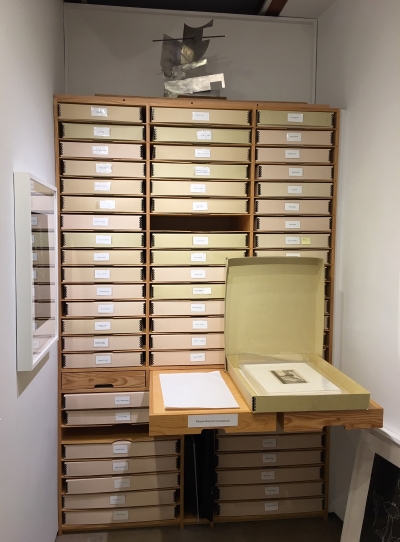
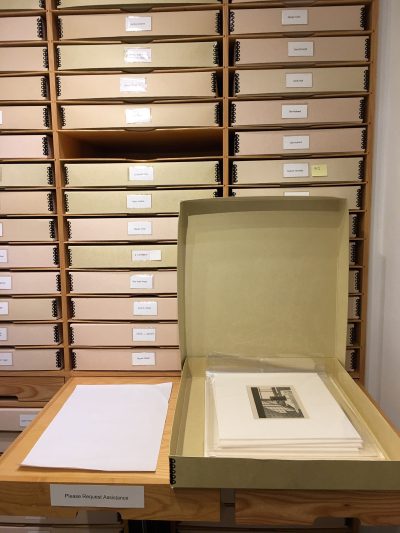
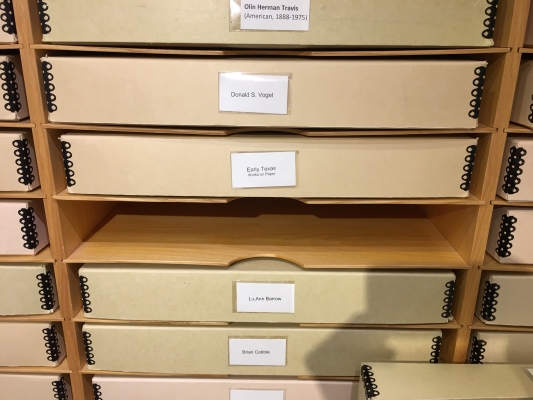
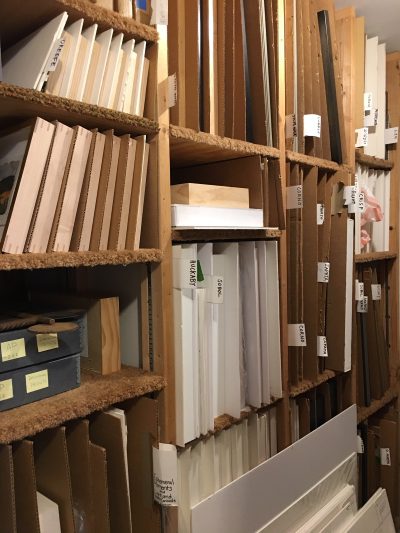
Unframed Works on Paper Storage in a Public Gallery Space
We cleaned up a poorly used closet off one of our gallery spaces and turned it into a works on paper storage and viewing space.
This unit, designed to fit into the end of a closet, is perfect for storing works on paper.
We built shelves for thirty 16 x 20, fifteen 20 x 24, and sixteen 24 x 30 standard sized archival boxes to store unframed works on paper the gallery has in inventory.
The three built-in pull-out shelves supply an instant scalable table, when needed, to work on.
The three pull out shelves designed into the cabinet allow easy handling of the boxes and serves as a platform to show artworks to clients.
Although the shelves are thin, the majority of each box’s weight is distributed around the outer edge of each shelf, close to where it meets the supporting sides.
Although the shelves are thin, they can handle the weight of a fully laden box because the weight is spread out across the entire shelf and the box is supported around the shelve’s edges.
This system of shelves can easily be designed to fit most anywhere. For instance, if there was no room anywhere else in the house for storage, a sculpture stand could be made on wheels with shelves on one side allowing the unit to be turned against the wall to hide the boxes from view. About the only place this type of box should not be placed is on the floor, especially under a bed. (Artworks should never be stored under a bed.)
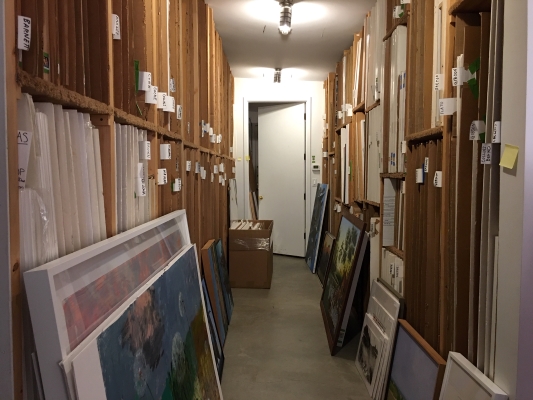
Housing Artworks In Gallery Storage Areas
At Valley House, the main storage area is not open to the public like in some galleries. Because of this, the racks are designed for function, not looks.
This is one of the artwork storage areas in the gallery that is not open to the public. This particular area handles medium sized artwork.
The racks on this aisle are designed to handle mid-sized artworks. The depth of the rack on the left is 54 inches deep. This depth was accomplished by designing 48 inch deep racks and moving them off the wall by 6 inches. The 54 inch depth was chosen to allow a 48 inch wide painting with a large frame to fit the rack properly. All the separators are 54 inches deep and hit the back wall to keep the artworks properly separated so they don’t scrape against each other when moved in and out. The aisle between the racks is 56 inches wide. This is so that, a painting can be pulled straight out of the rack without being obstructed by the opposing rack.
There are three 2 x 4’s that make up each of this rack’s vertical support sections. Supports are on 24 inch centers so each shelf, made of carpeted 3/4 inch plywood, has 22 1/2 inches of usable space. This narrow shelf width will support most any two dimensional artwork that is placed on it.
The shelves in this section are held up by one of two types of support. The first is a 1 inch wood dowel that is slipped into a 1 inch hole drilled through the side of each of the shelves’ 2 x 4 supports. It was drilled taking into account the ultimate height of the shelf. Depending on the length of the dowel, it can either go through the 2 x 4 and stop on the other side or stick out on both sides to provide support to the shelf next to it.
This shows how dowels are used to hold shelves in place. In this case, a 1 inch hardwood dowel is inserted through a 2 x 4 support. Although not seen here, the dowel extends through the support to also hold the next shelf in place.
The second type is a 1 x 2 inch stick, cut to the width of the 2 x 4. Here it is drilled with counter sunk pilot holes and then affixed to the support with sheet rock screws at the height needed. A 48 inch long 1 x 2 could have been used instead of the shorter ones if more support was necessary.
A drilled and counter sunk 1 x 2 can also be used to support a shelf.
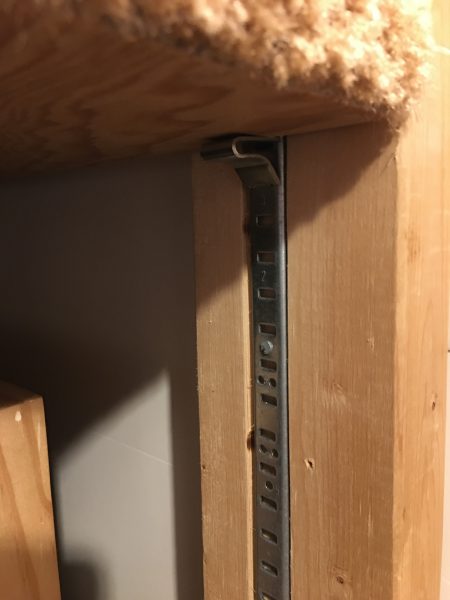
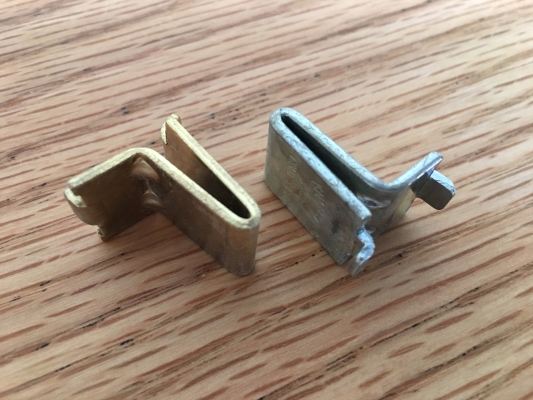
In the same storage space, seen below is a rack designed for smaller scale framed works. The structure is the same as the larger racks but this section is only 30 inches deep. Because the shelves have to support less weight, they are supported with a KV shelf support system.
The 2 x 4 supports have been routed to allow the KV clip rails to be flush with the surface of the 2 x 4. This allows the shelves to properly fit between their supports.
2 x 4 supports were routed so KV clip rails fit flush allowing the shelves to do the same.KV clips
I hope these art storage solutions are helpful and inspire a plan to build proper storage for artworks that are on sabbatical. Long term storage of artworks haphazardly stacked in a closet, or worse, under a bed is asking for trouble.
Following is a List of Things to Think About While You are Planning a Storage System for Your Collection.
Determine if you want on or off-site storage
Determine if you want other people to see your storage area as it may make a difference on how you want the racks finished out.
Determine how much storage you need now and project how much you will need in the future, considering what you are collecting and your collecting history.
Determine if you need climate-controlled storage for what you are collecting; works on paper will need it, but ceramics may not. If you are not sure, consult a conservator in the field you are collecting.
Be sure that the width of the rack you design is, or is less than, 1/2 of the distance to whatever immovable object is in front of it, whether it is another facing rack or a wall.
Be sure that you consider the weight of the artworks you are planning to store and determine if the structure you are designing will support that weight comfortably.
With that in mind, be sure the distance between the vertical supports is not too great when designing your racks. Remember that with every inch of extra distance between the vertical supports their is space for another artwork. This extra weight may cause the shelf to bow and eventually fail. A shelf made from 3/4 inch plywood that is expected to support large glazed artworks should not be any wider than 24 inches. To support really heavy works, there is nothing wrong with laminating two shelves together.
Always use cut pile carpet on a shelf rather than closed loop. The loops can catch on the edges of a frame or cause a wood frame to splinter while an artwork is being slid in or pulled out.
The separators used should be either foam core, fluted cardboard, or pure fluted polypropylene sheet. Acid free fluted cardboard would be a preference over regular but is not always practical. (Be sure to slide artworks slowly back and forth into their rack space. This will help slow what I call “rack rash.”)
It is important that, whatever type is chosen, all separators properly fit the depth and height of the rack. They should minimally stretch from the back of the rack or back stop to the front of the rack in length and be about 1/2 inch below the shelf above it in height. (Please do not use separators that are not the right depth. You may not know when a short separator is not properly protecting the artwork next to it and damage can easily happen when a work is moved in and out.)
It is always a good idea to provide movable shelf supports so they can be moved when wanted. However, it is my experience that once you have established heights for each shelf and have cut separators to the proper size, you will most likely not move the shelf heights again.
So, you have decided to paint the living room. While the workers do their thing, you have determined that the furniture can be moved to the center of the room and be protected via drop cloth, but where and how should you temporarily store your art for the next two weeks while the paint dries? Temporarily Storing your Artwork, A Case Study will help you decide.
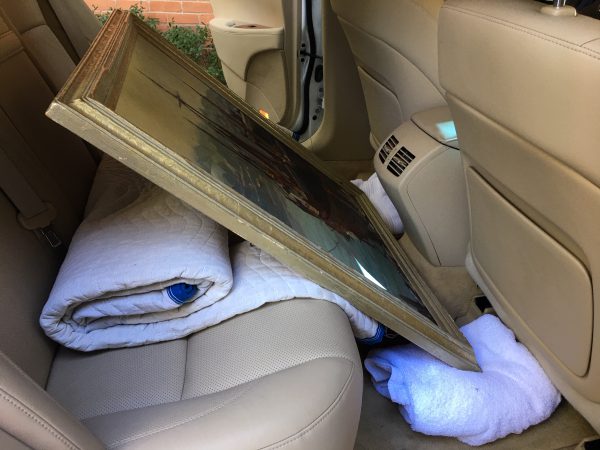
As with my post on transporting an artwork in your car, I will make suggestions on how to temporarily store artwork by safely stacking two-dimensional works against a wall using protective materials that would be found in your home or could be picked up at a local U-LINE, Lowes, or Home Depot. If you are lucky to live with museum quality works, you might want to call an art moving company to carefully pack and move them to a bonded climate-controlled storage facility and read no further. If your artworks are not of museum quality, carefully stacking them against a wall and providing protection at any points of contact can work just as well.
Deciding Where Your Artwork Should Be Stored
Choose a climate-controlled space to store your art. One of the best storage spaces might be a rarely used guest bedroom where the artworks are out of normal traffic patterns and the door can be shut to keep out roaming pets. A deadbolt lock installed on the door would also keep out wandering “guests.”
Since many homes these days have climate zoned spaces so you are not senselessly air conditioning rarely used areas, if the “guest bedroom” you are planning to use is not in a frequently used zone, be sure to adjust that zone’s temperature a day or two before you are planning to move the artwork. This will allow its temperature to normalize to the rest of the house and confirm that the HVAC equipment is working properly. Remember the main things to worry about are temperature, humidity, and airflow. The atmosphere of the storage space should be close to the living room they came out of.
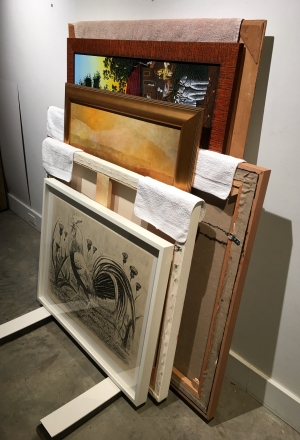
LEFT: Since this is an oil on canvas, it can be stacked and carried in any orientation. RIGHT: This hinged and glazed work on paper should only be stacked in its upright orientation so the weight of the lithograph will not tear the hinges that hold it to the back mat.
Find a wall where the largest artwork you are storing will fit so its entire top frame edge is fully resting against it. If the artwork is not a work on paper and not hinged, it can be place in any orientation, so its smallest side should be leaning against the wall. If it is a glazed work on paper and/or hinged, it needs to always be kept upright. If you have many artworks, they can be divided into multiple stacks, especially if there is a lot of weight involved or a large size differential between artworks. It is often a good idea to group the works in general size categories, like large, medium, and small, and stack them accordingly.
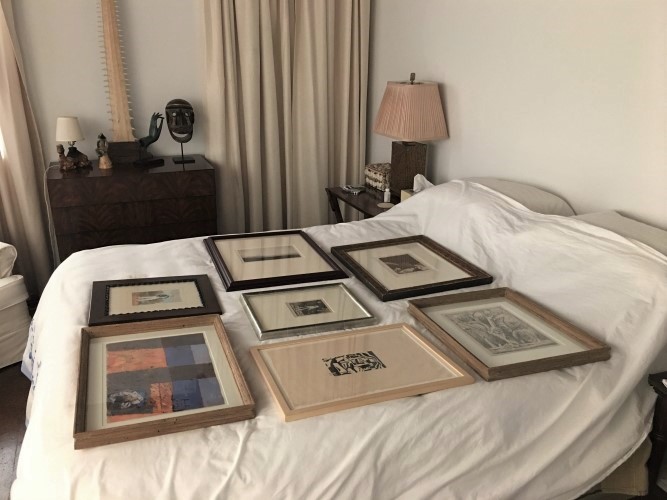
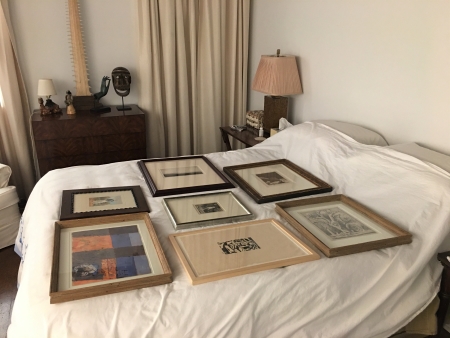
The bed in a spare bedroom is a great place to temporarily store small artworks. If they are to be covered, to keep dust off them, only use a thin transparent plastic drop cloth so it is obvious that there is art on the bed. Be sure to keep pets out of the room.
If there is a bed in the room, place an old sheet over its bedspread and then lay the smaller works face up across the bed so they are not touching each other. The sheet will keep your bedspread from getting dirty from dusty frame backs. Although for the short term it is not necessary, if you are concerned about dust, cover the artworks loosely with a thin clear plastic drop cloth so anyone entering the room can see that there is artwork covering the bed.
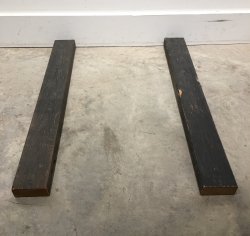
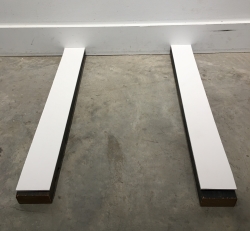
Here are two 2×4 wood risers that will keep a stack of artworks off the floor. This should help protect your artwork from a possible water leak.
Since water leaks do happen, I highly recommend placing something on the floor to stack the artworks on. This could be a couple of 2 x 4 boards placed perpendicular to the wall and far enough apart so the artworks straddle them comfortably, or setting a folded fold-up table on the floor against the wall and placing a rubber backed bathmat on it so the artworks will not slide on the table top.
Do not stack the artwork over or in front of an HVAC register or return. It is alright to stack the works next to a return but not a vent that would blow hot or cold air directly onto the artwork. Be especially careful of large light canvases, as they can easily be blown over if a vent is blowing air behind a leaning work.
Note: As these artworks may have been hanging in your living room for a very long time, take the opportunity, as each is taken down, to dust the backside of their frames before moving them to where they will be stored.
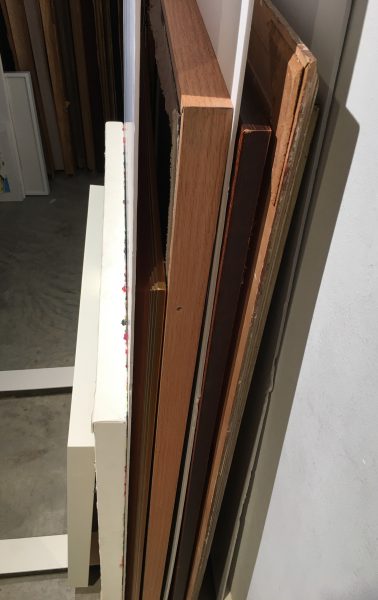
Preparing and Properly Stacking Your Artworks
The type of artwork and how it is framed will determine how it should be stacked against a wall. In an ideal situation each artwork would be properly wrapped for its type and how it is framed, and then each would be boxed or at least separated by a sheet of fluted cardboard, foam core, sheet insulation or other type of light stiff separator. Since we are talking about stacking the artwork against a wall for a couple of weeks, following a few rules of thumb will achieve pretty much the same outcome without all the packing. So, here are a few thoughts and suggestions on how to prepare and stack your artworks.
Create a Working Inventory
Create an inventory of the works you will be moving to your designated storage space. Index cards work well here as they can be put in the order they will be moved and stacked. Be sure that along with the information that identifies each artwork, you include the artworks’ total framed dimensions, including their depth. Also note if any of the artworks’ supports are paper and are glazed as this will normally indicate that they must be stacked upright. You may want to circle the hinged artworks, showing you cannot change their orientation the way you can, in most cases, with an oil on canvas or panel. The cards should be sorted so that the largest work is on top and the smallest is on the bottom.
Note: As opposed to the way almost everything else in the universe is measured, artworks are measured using height before width, and then depth.
Take a tape measure to the space you are planning to store the works and make sure that the largest artwork will fit the available wall space considering its proper orientation.
This shows two strips of foam core placed on top of the 2×4 risers. If used, they will help protect fragile frame finishes from damage while in the stack.
Using Risers to Raise Artwork Above the Floor Level
To determine the length of the risers that will keep the artworks off the floor, let’s say they are 2 x 4 boards, add up all the depth measurements on the cards you anticipate will be in the largest stack and add 12 inches to account for the separators if you are planning to use them. Also consider the angle against the wall of the first artwork in the stack. It does not matter if the boards are a bit too long, you just don’t want them to be too short. The risers should be placed perpendicular to the wall and far enough apart so the smallest artwork in the stack will sit on top of them. If the frames are fragile, you may want to cut two 3.5-inch strips off one of your separators and place it on the 2 x 4 risers before you start stacking artworks.
General Rules for Stacking
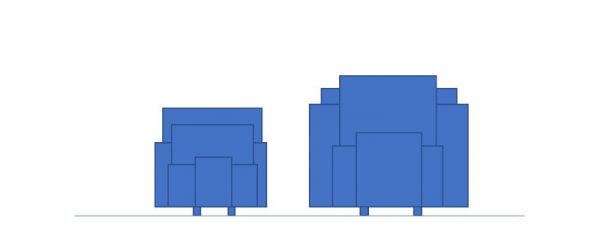
Both of these diagrams show proper stacking technique. Each artwork is placed so it has at least two points of contact with the artwork that was stacked before it.If no dividers are used when stacking and there are no backings on the artworks themselves, then the last three artworks in the stack at left and the last artwork added to the stack at right are improperly placed and will be pushing into the back of the artwork in front of each.
As a general rule, artworks should be stacked in a graduated order with the largest against the wall and the smallest being the last work added. If the first work placed is facing the wall and it is backed or has stretcher braces, it may have a smaller work stacked against it.
LEFT: If an oil on canvas has stretcher supports, a smaller artwork can be stacked against it when separators are not available. RIGHT: This is also true if an oil on canvas is backed with a cardboard or foam core.
If the artwork is not backed or has stretcher braces, each new work that is added to the stack, whether using sheet separators or not, should either match or exceed its predecessor in either height or width, not both. This way, it will span an unprotected canvas and have at least two points of contact at the top, or upper sides of its frame.
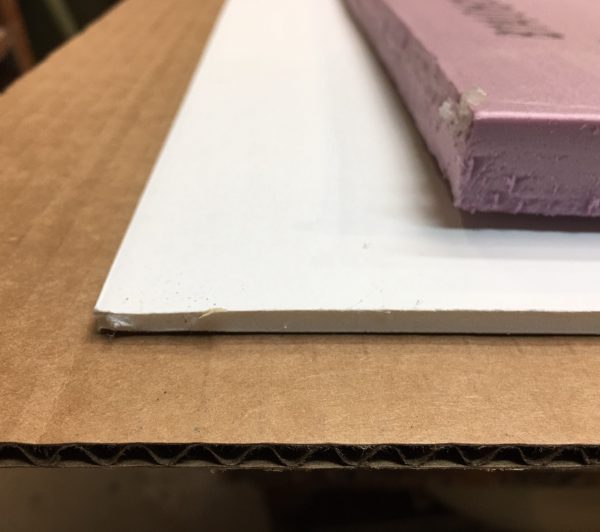
Illustrated are three materials that will work as separators when stacking artworks. The top is 3/4 inch foam insulation board, the middle is foam core, and the bottom is fluted cardboard.
Using Separator Sheets to Protect Artworks
As mentioned above, it is always best to use separators between each artwork in a stack. I would recommend sheets of fluted cardboard, foam core, sheet insulation or other type of light stiff separator material. For each artwork added to the stack, place a separator sheet that is larger than the work it is placed in front of. That does not mean that it needs to be cut down to fit, it just means that the sheet should not be smaller.
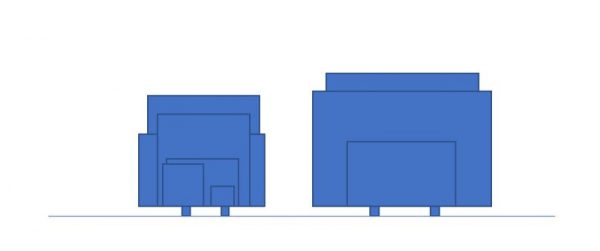
This shows artworks stacked with separators between each work. This provides the most protection for each unwrapped artwork in the stack. Note that the third separator from the end of the stack is sideways to properly cover the artwork behind it.
Note: Do not use soft materials to cover or wrap artworks such as blankets or sheets unless they are all glazed and backed works. Cotton blankets would be preferred over wool, especially if the artworks are pastels. Pastels should never be stored with their faces at a forward angle or face down. It would be best to place a glazed pastel, face up, on a bed.
If you don’t have enough separators to put one between each artwork, you can stack the artworks front-to-front and back-to-back placing a separator between the artwork’s faces.
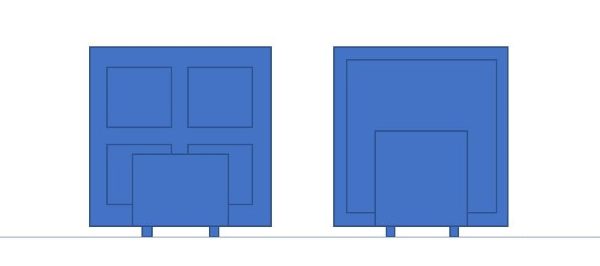
If you have more artworks than separator sheets, the face-to-face, back-to-back method of stacking may be appropriate. That means you should start your stack with a separator sheet against the wall and then place the first artwork, so it faces the wall and the top of its frame is in contact with the separator sheet and not with the wall. The second artwork should be placed, using the “at least two points of contact” rule, with its back to the first work. Then place a separator sheet against the face of the second work and repeat the process.
When separators are not available, artworks can be stacked front-to-front and back-to-back making sure that each artwork added has at least two points of contact with the artwork in front of it. Where two artworks touch in the face -to-face configuration, washcloths can be used to pad the frames at the points where the frames touch.
Stacking Without Separator Sheets
If you are planning on stacking without separator sheets, certainly not recommended by me, you have to be extra careful how and where each artwork makes contact with the artwork in front and behind it, and the “at least two points of contact rule” needs to be strictly adhered to. Also, if their weight and center of gravity is not a problem, they should, in most cases, be stacked face-to-face and back-to-back. When stacking, the artworks that are placed back-to-back should be touching all around. The works that are stacked face-to-face should not touch except at two upper points of contact. Where the frames touch, two folded washcloths can be used as protection by laying them over the frame where the contact is made.
Note: While works are stacked this way, they should remain undisturbed until they are unstacked to be reinstalled. Do not pull several works in the stack forward to show off a work, and under no circumstances pull a work from the center of the stack. If a work is needed, carefully unstack the works back to that artwork.
The Issue of Weight
Weight is a factor that may determine how many works should be in each stack. Large glazed works with heavy frames weigh a lot. You may not want to place any more than three or four works in a stack of artworks like this. Canvases with strip molding may not weigh a lot and therefore it might be realistic to stack more. Bottom line; you don’t want to stack so many artworks together that a single person could lose control of it if they were supporting it while another person was flipping through the artworks.
Determining an Artwork’s Center of Gravity
You will need to determine the center of gravity for the first artwork that starts a stack and ideally, each artwork that follows as they are placed. This can be determined by setting each artwork vertically on the floor in the orientation it will be stacked. It will normally want to fall forward or back depending on its center of gravity. (Whichever way it wants to fall, that is the side that should face the wall.) This means that if you are using separators between each artwork, they should be stacked in the direction that they would naturally fall. Works that do not easily fall one way or the other have a neutral center of gravity so they can be safely stacked either way.
Properly Setting the Angle of the First Artwork
The angle at which the first artwork is placed against the wall in a stack is very important! If the angle is too little, even if you have determined that its center of gravity will tend for it to naturally hug the wall, it sets up a situation where if other artworks are not stacked properly, it could allow the stack to fall. On the other hand, if the angle is too much, it will place undue stress on the stack because with every degree of extra angle added, the stack becomes progressively heavier with the first artwork that started the stack bearing the greatest weight. Also, instead of the possibility of the artworks that are stacked with too narrow an angle falling over, too much of an angle could cause the artworks at the end of the stack to start sliding out from the bottom. Also, the change of angle related to the height of the artwork also must be considered.
It is best to keep these issues in mind when determining how far the bottom of the first artwork should be away from the wall when setting the stack. Unfortunately, there is no formula that I know of that is a standard rule of thumb to determine the perfect angle, especially with all the unknown variables when you start. So, the best I can do is let you know how I do it:
I place the top of the first artwork so the side to which it naturally wants to fall is against the separator sheet that is leaning against the wall and its bottom is sitting on the riser about 4 inches away from the wall. I then pull the top of the artwork away from the wall about an inch to feel the weight of its resistance. If it seems too little, I will move the artwork’s bottom away from the wall another inch and try again until it feels right. If it seems like it is heavy or has too much resistance, I would move the artwork’s bottom toward the wall an inch and try again until the resistance feels right. Then I continue stacking other artworks between separators until I think stacking more would endanger the first artwork or make the stack unstable. I test the resistance of each added artwork as it is placed to be sure it is properly weighted towards the previously stacked work.
I focused on a guest bedroom as a good place to store artworks for this post because most guest bedrooms are properly climate controlled and rarely entered, making them an ideal location for storing artwork. Remember, because of change orders or unexpected issues that pop up during most any renovation project, they are rarely finished on time. For this reason, it is best to store your artworks where they will not be disturbed until they are ready to be put back on the wall. Having to unstack the artwork and move it to a safer location and then restack it will unnecessarily put the artwork in danger.
I hope you have found the information in this post helpful. Although I have mentioned a way to stack the artworks without using separators, I recommend using them. They will provide a higher level of protection to both the artwork and frames, especially if there is a situation where the stack falls over for some reason.
If your storage needs exceed the short term, you may have interest in reading my post, Four Artwork Storage Solutions. In the meantime, happy stacking.

 Painter/Printmakers
 Documenting Your Art Collection
 How Do I Get My Art Appraised?
 Practical Tips for Safely Transporting Artwork
 Temporarily Storing Artwork: A Case Study
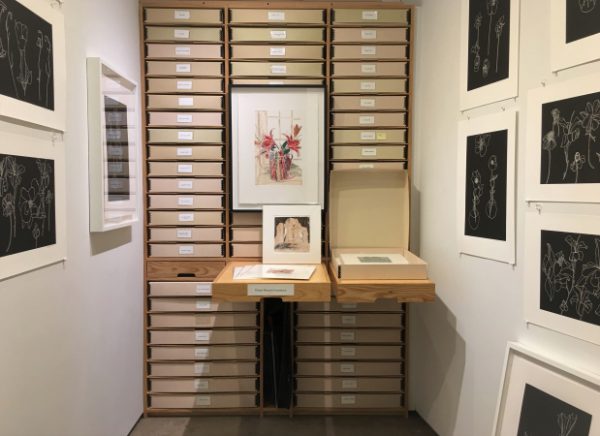 Four Artwork Storage Solutions
 Hanging and Framing FAQ’s
 Siting Sculpture, Part One: Overview
 Siting Sculpture: Part Two, A Case Study
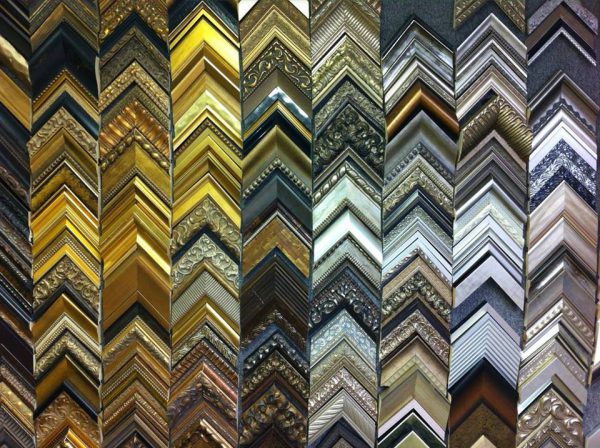 The Importance of a Proper Frame
 When to Use UV Control Glazing
 Reflection on the Problem of Reflections
 The Value in Fine and Reproductive Prints
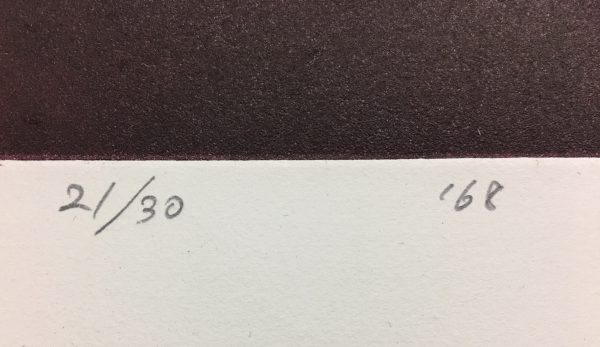 What Does That Fraction Mean on a Fine Print?
 Welcome to FAE!
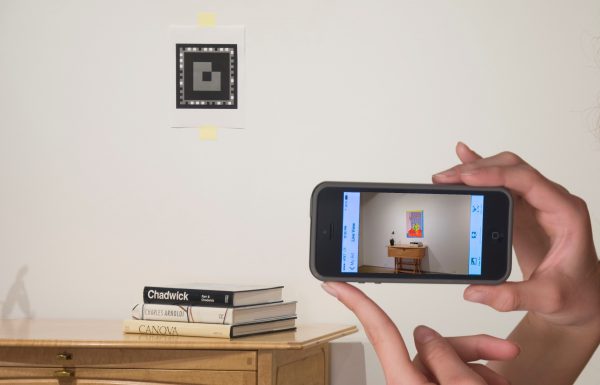 Announcing the FAE App, now available from iTunes!
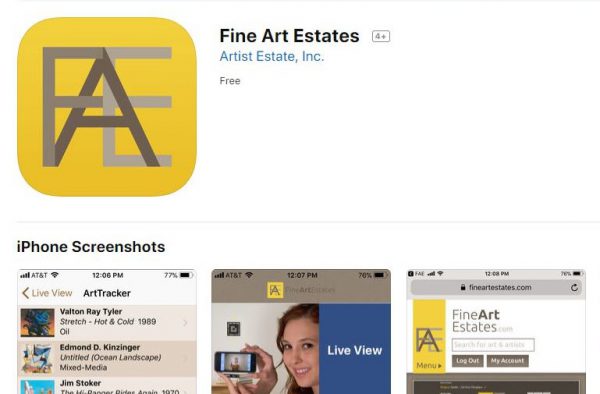 Will It Work in My Space?
 Anatomy of a View
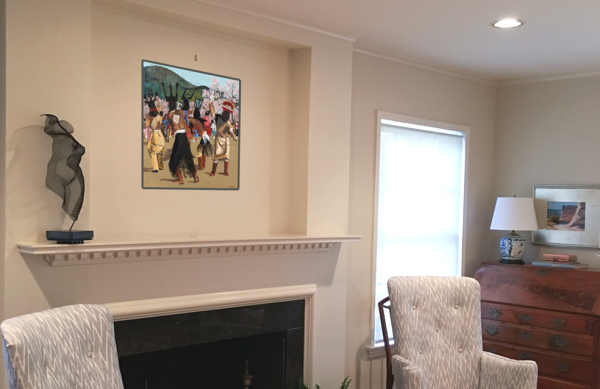 Creating Stunning Presentations with FAE