
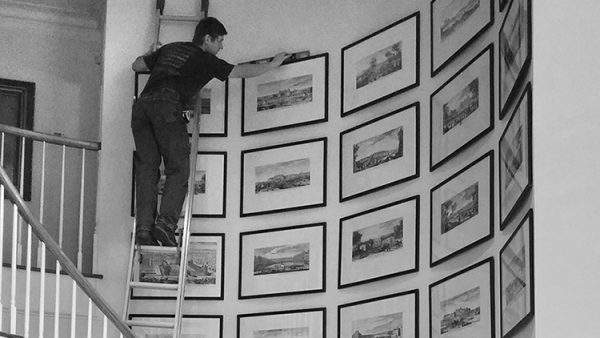
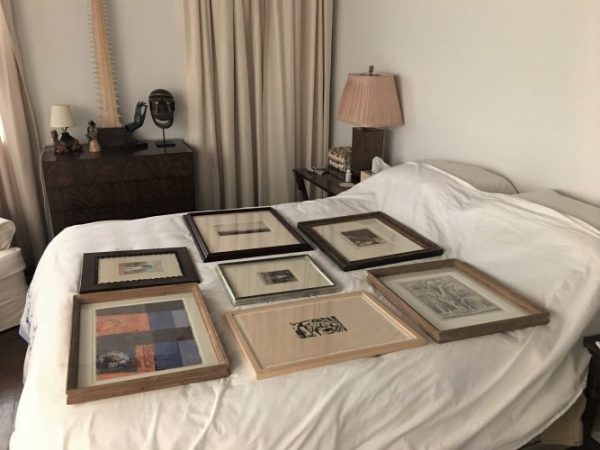
I am often asked questions regarding the hanging and framing of 2-dimensional artworks. So, I have written a new post answering a few Hanging & Framing FAQ’s. As there are many easily accessible videos available on how to hang a work of art yourself, I thought it best to focus on things I have learned from experience that many of those videos do not cover. Although hanging a medium-sized work of art on a plasterboard wall at eye level is not difficult, I advise that for safety, any installation that requires a ladder be turned over to professional installers. I have included tips on what information to gather before you contact an installer that should save you time and money in the long run.
Framing and hanging FAQ’s:
-
Why is there a paper or cardboard backing on many framed 2-D works?
-
Is it better to use mirror hangers (D rings) or wire to hang a work?
-
What type of hangers should be used to hang artworks on a sheetrock wall?
-
Is there a standard height for hanging 2-D artwork?
-
If I decide to use two hangers rather than one to affix a wired artwork because of weight, should I do anything different?
-
After establishing one hook in the wall and realizing that the hook needs to go up a quarter of an inch, what should I do?
-
Can a hook be reused, and if I have removed the hook for any reason, should I just put the same hook back into the hole it was removed from?
-
How should I prepare before contacting a professional installer?
1. Why is there a paper or cardboard backing on many framed 2-D works?
When you pick up a newly framed work from your frame shop, you will normally find that there is a backing of some kind on the verso of the artwork. For a framed work on paper, the backing will usually also be paper, and for a framed canvas the backing will likely be foam core or a fluted cardboard.
For a work on paper, the paper backing is there to keep dust and insects from getting into the back of the frame assembly. Most people will hang the newly framed work on the wall for the next 20 years and the backing will do its job. However, if you rotate art in your frames, having to remove the paper and the messy double stick tape residue that is left is a lot of work. If you are planning on reusing a frame regularly, it is best to ask your framer not to put the backing material on that frame. If brown Kraft paper is used to back an artwork, over many years, it will become brittle and actually break up rather than tear. When this starts to happen, it is probably time to have a framer check to see if the frame, and the artwork, need attention.
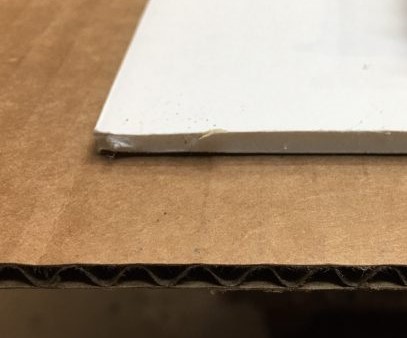
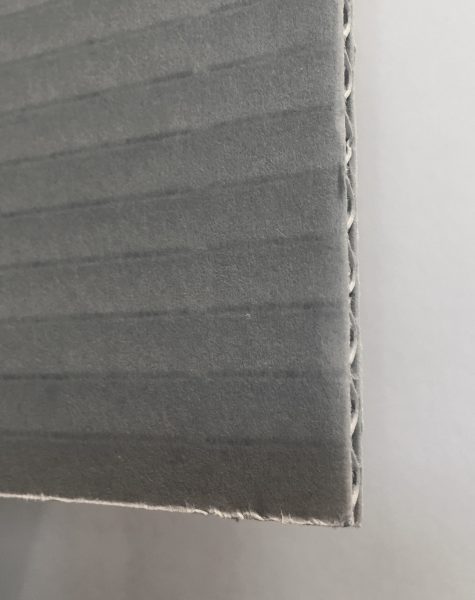
For paintings on canvas, a backing material such as foamcore or brown fluted cardboard is normally used. These materials not only keep bugs and dust out, but they also protect the back of the canvas while the work is in transit. It helps to prevent a hit or poke to the canvas from behind, especially if the artwork will be moved around a lot. The best material for backing a stretched canvas is acid-free fluted cardboard which is often gray in color. Although foam core is often used, over time, the foam between the paper layers will start to degrade and it will not be as effective as it was when it was new. Brown fluted cardboard has a very high acid content and, over the long term, can adversely affect anything it is adjacent to.
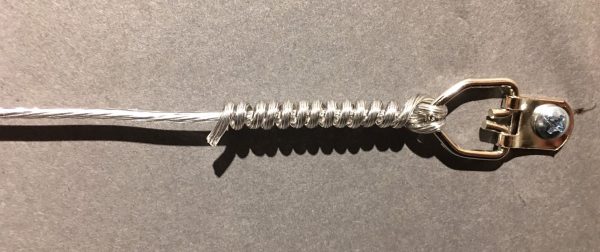
2. Is it better to use mirror hangers (D rings) or wire to hang a work?
The answer is, it depends. Both types of hanging methods work but here are a few reasons why one would be preferred over the other.
Mirror hangers:
- + Best method for a long-term installation
- + Will keep the artwork level
- + In most cases, will hold the artwork closer to the wall
- + Automatically puts less stress on the hanger and frame

Wire:
- + Often better for short term installations or for works that will be moved frequently
- + Minimum impact on the wall as often one hanger can be used rather than two that are far apart.
- + Wire now comes plastic coated and will last longer
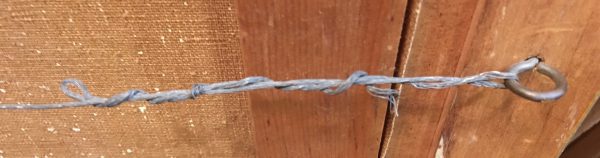
- – Uncoated braided hanging wire can rust and break over time
- – Wire is under constant tension and may break over time
- – May not stay level requiring occasional adjustment
- – keeps a constant inward strain on the frame
- – If two hooks are used and not placed properly, a constant sideways torquing pressure could be exerted on each hook causing them to eventually fail.
Caution: Before you hang a work with wire, here is an easy way to be sure that the wire will safely hold the weight of the artwork.
- Lift the artwork by its wire about an inch off the floor so you can feel the force that is needed to lift it.
- Set the work back on the floor gently maintaining the same level of force on the wire it took to lift it.
- Place your other hand on top of the picture holding it down to the floor.
- Pull up on the wire with about 25% more force than it took to get it off the ground.
- If the wire breaks or is pulled from either of the mirror hangers holding it in place, have your framer replace or reset the wire, or just remove the wire, reset the hangers so they are vertical, and hang it from the mirror hangers instead.
Since screw eyes are not normally used today, their use often indicates that the wire is older and needs to be replaced. When replacing the wire, mirror hangers should be retrofitted for the screw eyes because, especially in the case of older frames, as the wood dries and looses density the screw eye will lose its purchase and eventually fail.
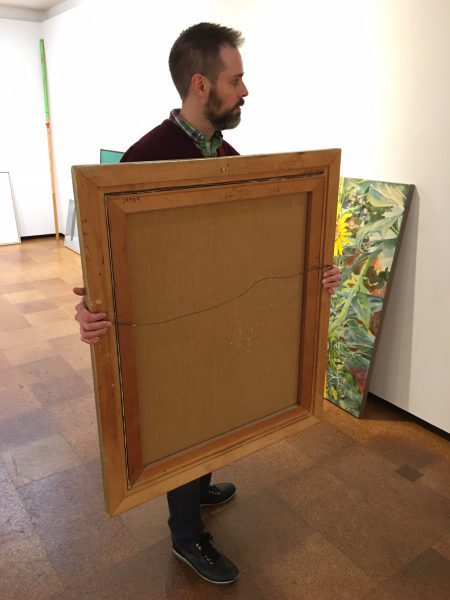
Tips on How to carry artworks: Always carry an artwork upright facing you, holding it with two hands from both sides. It is not a good idea to carry it from the top of the frame, and it is best not to carry it around by its hanging wire if it has one. You are making a lot of assumptions by doing so and you have much less control over the artwork.
3. What type of hangers should be used to hang artworks on a Sheetrock wall?
Although there are many hanging systems available on the market today for hanging 2-D artworks on a Sheetrock wall, for home use, most professional art installers use a floreat-style hanger. This type of hanger was designed to exert minimal impact on the structure of the Sheetrock, yet securely hold the weight each hook is rated for. Each thin nail is made of strong high-grade steel and after the hook is installed, the nail can be removed in most cases by twisting it while pulling it out with your fingertips. The design of the hook forces the nail to maintain an angle of 65 degrees as it goes into the sheetrock.

This angle is maintained so that most of the nail’s length is held in the structure of the rock. When a painting’s wire or mirror hanger is placed onto the hook, the weight of the artwork pulls the hanger down flat, clamping it against the wall. This combination makes for a strong hanging system.
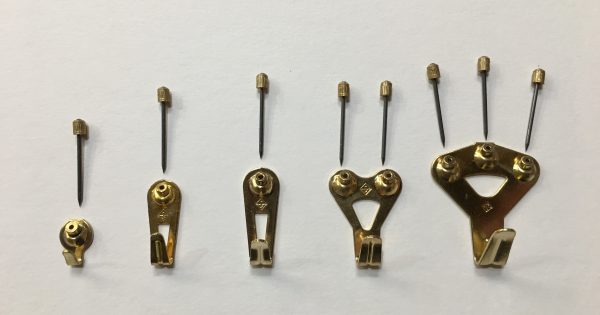
Floreat hangers come in five weight levels: 10, 20, and 30-pound hooks use one nail, 50-pound hooks use two nails and 75-pound hooks use three nails. As a rule of thumb, I always try to use a hook that is one weight level above what I think will hold the artwork. If the artwork weighs about 15 pounds, I will use a 30-pound hook, not a 20-pound hook etc.
4. Is there a standard height for hanging 2-D artwork?
Yes and No. If you ask a museum installer or gallery owner at what height they prefer to hang in their spaces, they will provide you with a number between 57 and 62 inches that they, or their institution prefers. This number refers to the height above the floor of the center line of each medium size artwork they hang. It is determined by the height of the wall, the size of the space, and the height that is most comfortable for the average person to view the work. (whatever average is)
Consistency is actually more important than the height that is chosen. That is, if you have determined a hanging height that is most comfortable for you to view artworks in your home, then use that height consistently throughout the room and preferably the entire house depending on each room’s ceiling height. Imagine how a line of medium-sized artworks would look in a museum if they hung each one at a different center line height.
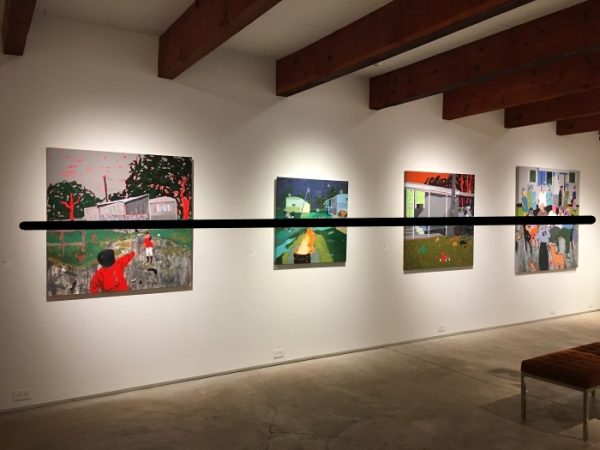
These center line height numbers become irrelevant if a painting is too large to work with the center line height chosen for everything else, but the height at which a larger painting is hung needs to relate comfortably to what is around it. And of course, this number is not helpful if you are hanging over furniture or a fireplace.
Tip: Do not intentionally try to line up the top of larger artworks with the top of a door or window frame. If it happens to line up because you are following an established center line height it is fine, but the room will feel a bit odd if works are hung a little high or low just to have them match another architectural feature that will create a visual line around the room.
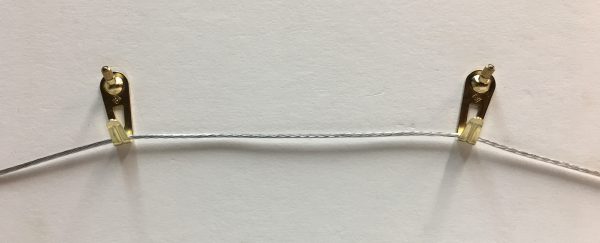
5. If I decide to use two hangers rather than one to hang a wired artwork because of weight, should I do anything different?
I recommend that when using two hooks, especially two or three nail hooks, they be canted inward so that the weight of the wire does not put stress on the nails and hook when hung. With one hook, because the wire forms a mountain shape, the weight vector is straight down.
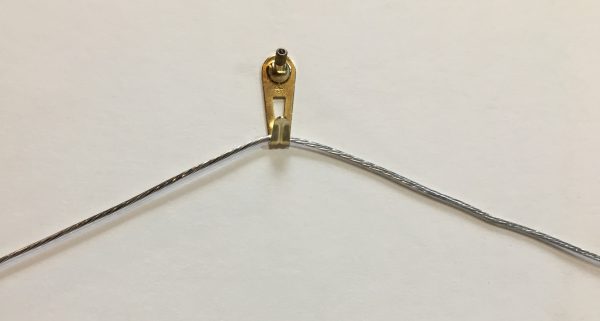
With two hooks the wire forms a mesa shape and the direction of the weight vector can be as much as 20 degrees off the vertical. If both hooks are nailed in vertically, as one would place a single hook. When the weight of the artwork is placed on it, it will have a constant sideways pull possibly causing an eventual failure.
6. After establishing one hook in the wall and discovering that the hook needs to go up a quarter of an inch, what should I do?
You can move the hook ¼ inch to the left, to the right, or below, but do not move the hook ¼ inch up. Since a hole was created in the Sheetrock from pounding the nail in for the first time, placing a nail ¼ inch above that hole means that the structure of the Sheetrock beneath the hook is now compromised and can fail.
If hanging the artwork from mirror hangers (D rings), move the hanger on the opposite side down ¼ inch to compensate. If hanging the artwork from wire using one hook, remeasure, and use two hooks rather than one. That will not only keep the artwork from eventually shifting out of level, it will double the amount of weight that can be held by just one hook.
7. Can a hook be reused, and if I have removed the hook for any reason, should I just put the same hook back into the hole it was removed from?
The answer to the first part of the question is yes, if the nail is not bent or damaged in any way. The answer to the second part is more complicated. Using the same hole in the Sheetrock again can be tricky if one is not experienced in hanging or working with Sheetrock. If the hook fits snugly and the hook does not move around loosely in the hole, and the hook holds a lot more weight than the artwork that is to be rehung, you are probably fine. If you are concerned, use the hook in a slightly different location or replace a one-nail hook with a two nail, or a two-nail with a three.
8. How should I prepare before contacting a professional installer?
It is always best to use a professional art installer to hang your art. Most installers work by the hour and you can save money by telling them the size and approximate weight of each artwork you want hung, where it is to be placed, and the type of wall they will be hanging the artwork on. With this information, they can work up a more accurate estimate, bring the appropriate manpower, and the proper hanging equipment for the project. Photographs of the front and back of each artwork, including their frames, and area photographs of the rooms that include the walls where the artwork is to be installed will be helpful.
I hope you find some of these suggestions helpful. If you have any other questions regarding the hanging, framing artwork, or anything else related to the art world, send an inquiry to [email protected].
*****
To see all available FAE Design Blog Posts, jump to the Design Blog Table of Contents.
To see all available FAE Collector Blog Posts, jump to the Collector Blog Table of Contents.
Sign up with FAE to receive our newsletter, and never miss a new blog post or update!
Browse fine artworks available to purchase on FAE. Follow us on Facebook, Instagram, or Twitter to stay updated about FAE and new blog posts.
For comments about this blog or suggestions for a future post, contact Kevin at [email protected].
Other FAE informational posts you may find helpful:
Fine Art Insurance 101
 Practical Tips for Safely Transporting Artwork
 Temporarily Storing Artwork: A Case Study
 Four Artwork Storage Solutions
 Hanging and Framing FAQ’s
 Siting Sculpture, Part One: Overview
 Siting Sculpture: Part Two, A Case Study
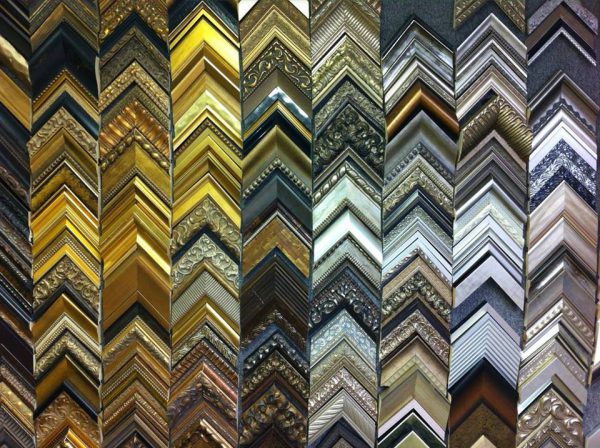 The Importance of a Proper Frame
 When to Use UV Control Glazing
 Reflection on the Problem of Reflections