We hope you have enjoyed reading some of the aforementioned informational posts FAE created for their design blog and were so kind to share with Valley House. If you have any comments or questions, please contact Kevin Vogel at: [email protected]
Designing a place to store the parts of your collection that you do not currently have on display is not as difficult as it may sound. One can either procure off site storage at a bonded fine art storage facility, or make space at home by assessing the dimensional space the art will take up that is currently resting and building rack spaces that are designed to safely accommodate it, taking into account your future needs.
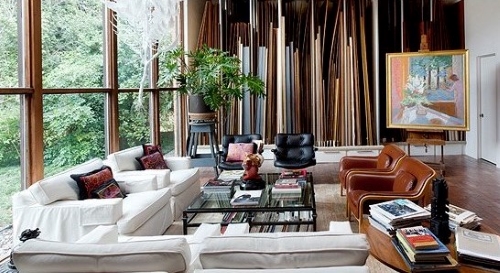
Artist’s studio converted into a living space but adding large painting storage as a design element.
Rather than provide a “do this for this situation” scenario, I thought it better to show the solutions we devised to store art in our home and gallery. These storage solutions have served us well and can be adapted to fit most any circumstance. They range from a large painting storage built into a living space and a framed works on paper storage in a closet in our home, to public and behind the scenes storage in our gallery.
Cheryl Vogel providing scale to the room.
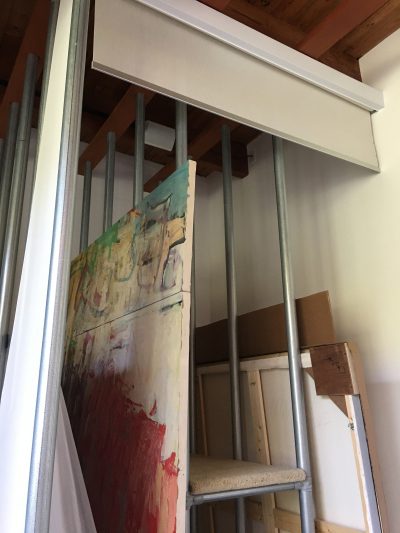
Visible Large Painting Storage:
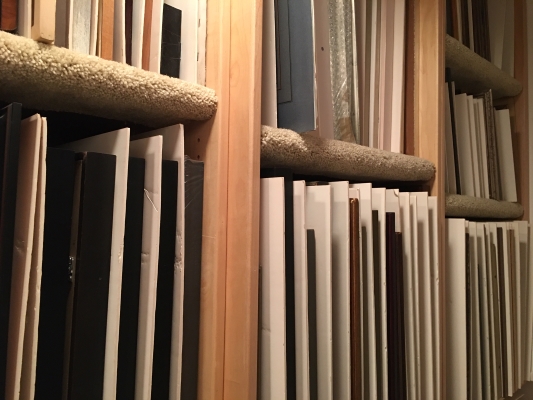
We had more large paintings than we had room for in the gallery, so we built large painting storage at the end of a room that was originally an artist studio. The storage had to be functional and a decorative element in the space. It also had to be easily removable if we decided not to store works there in the future.
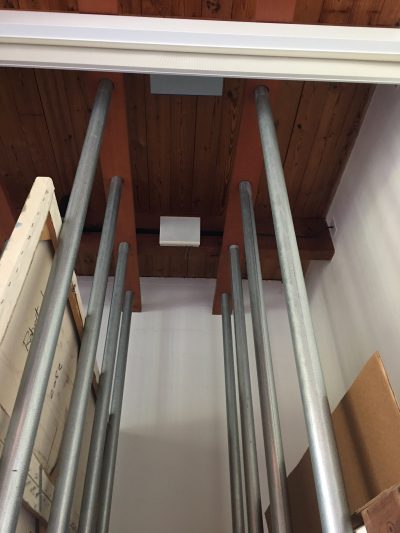
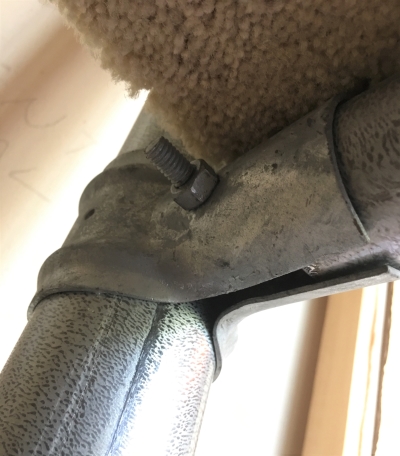
Images showing details of plinth, vertical supports and attachment points
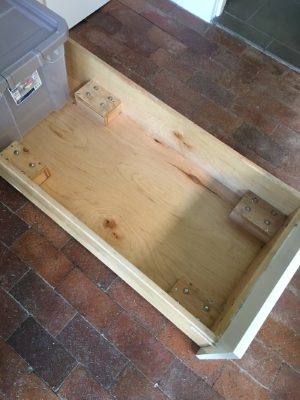
Since our house is in a flood zone, we created a plinth to put the artworks on and designed drawers on rollers that would fit within the body of the plinth, as deep as the plinth itself. The drawers hold plastic tubs for storage. We used 2 5/8 inch galvanized chain link fence posts for the vertical supports and a smaller diameter 1 5/8 inch of the same material to support the shelves.
Full depth plinth drawers roll in and out on recessed wheels for long term storage. Plastic bins keep storage items moisture and bug free.
The plinth was built in individual sections and the vertical support pipes were designed to be easily removed. In fact, if in a hurry, the pipes and plinth can be removed by two people in about two hours. We used carpet on top of the plinth to protect the frames and edges of the artwork. So that we could minimize the visual clutter of the artwork and fluted cardboard separators, we had motorized white scrims added that can hide the artwork from view when wanted.
This image shows how a shelf has been added to the rack with a detail of the connector below. The motorized scrim that covers this section of the rack is also visible above, partially deployed.
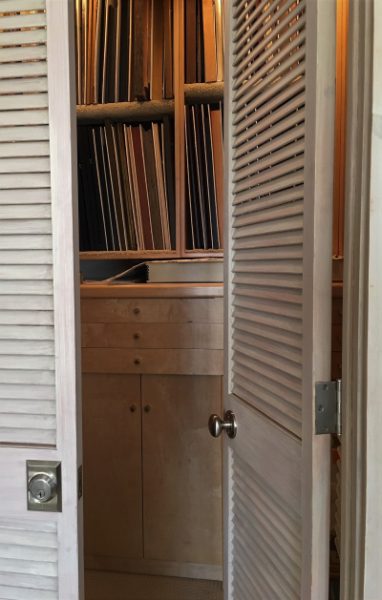
Built-In Storage in a Walk-In Closet
To store a collection of framed small works on paper, we had shelves built into a walk-in closet located in an unused bedroom.
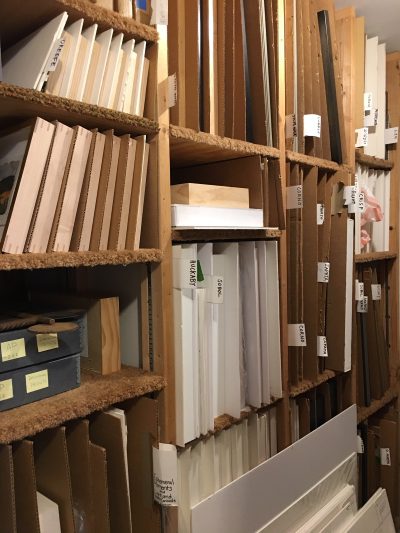
This image shows rack spaces that have been built into a walk-in closet. Two of the three structural boxes that make up the racks were built over a storage cabinet. The louver doors serve as an HVAC return.
Since most of the framed works were small in scale, we did not need extra strong supports. A system of 3/4 inch high grade plywood boxes were built and the sides were drilled so the shelves could be supported with shelf support pegs. To keep the temperature and airflow appropriate for works on paper, we had an HVAC register installed in the closet (shown below) and used louver doors that acts as a return (shown above). Since the house is adequately secure, we were not concerned about security here other than keeping honest people out.
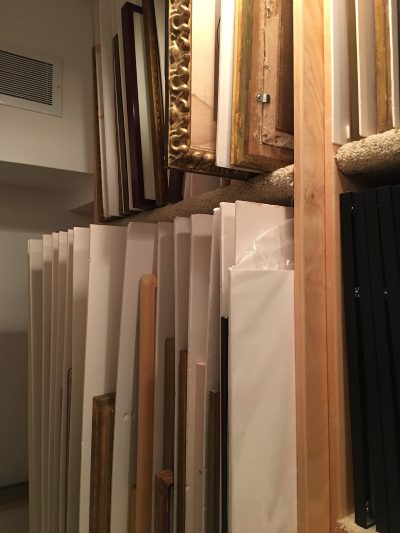
The rack space at the bottom demonstrates how the separators should be cut to protect artworks that are larger than the depth of the rack. The HVAC register seen at the upper left keeps the temperature and humidity within limits and the air moving.
We used foam core separators for this rack space as it is less likely to scuff antique frames than regular cardboard. It does not matter if the artworks extend beyond the front of the end of the shelf, as long as the separators are cut to accommodate the extension and there is enough room opposite the shelf for the artworks to be removed with ease. Make sure that all framed works on paper will fit the rack spaces in their upright configuration, as they should never be stored sideways or upside down.
The carpet is cut pile and the front of each shelf, in this case 3/4 inch plywood, has been rounded so the carpet can be wrapped to form a soft bumper.
Here is where two rack boxes of slightly different depths come together.
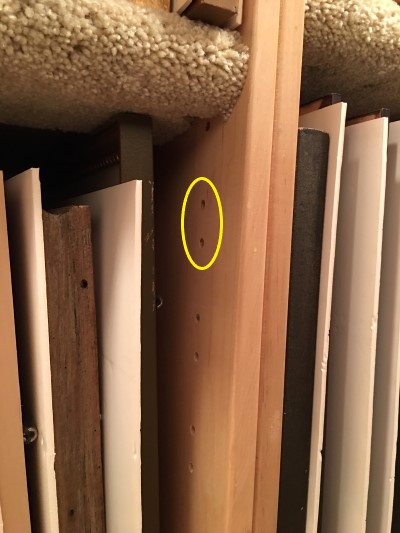
Holes were drilled all around the supports so four shelf support pegs can hold each shelf wherever needed. The holes for the shelf support pegs need to be drilled close to the front edge of the box sides as shown below.
Holes are drilled into the sides of the box for the shelf support pegs.Shelf Support Pegs were used here.
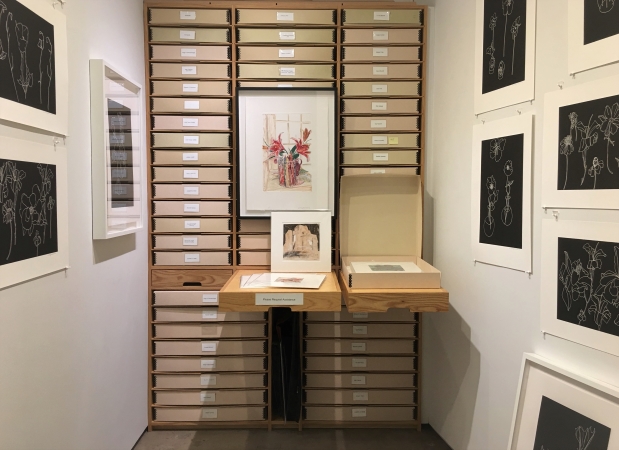
Unframed Works on Paper Storage in a Public Gallery Space
We cleaned up a poorly used closet off one of our gallery spaces and turned it into a works on paper storage and viewing space.
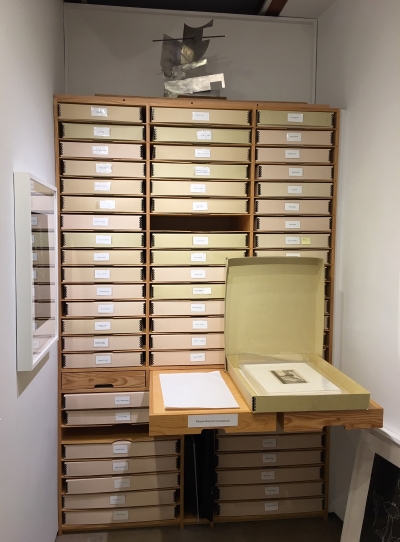
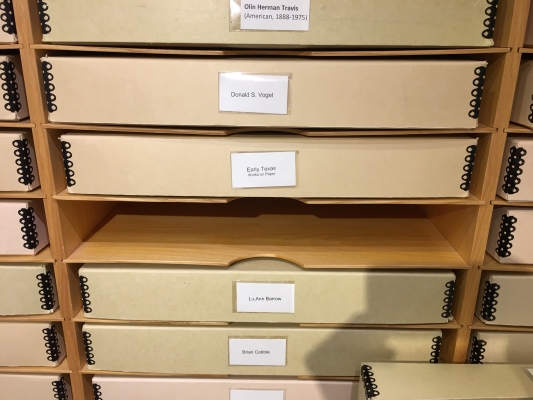
This unit, designed to fit into the end of a closet, is perfect for storing works on paper.
We built shelves for thirty 16 x 20, fifteen 20 x 24, and sixteen 24 x 30 standard sized archival boxes to store unframed works on paper the gallery has in inventory.
The three built-in pull-out shelves supply an instant scalable table, when needed, to work on.
The three pull out shelves designed into the cabinet allow easy handling of the boxes and serves as a platform to show artworks to clients.
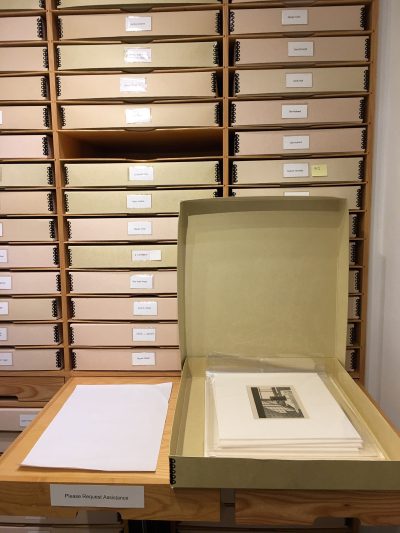
Although the shelves are thin, the majority of each box’s weight is distributed around the outer edge of each shelf, close to where it meets the supporting sides.
Although the shelves are thin, they can handle the weight of a fully laden box because the weight is spread out across the entire shelf and the box is supported around the shelve’s edges.
This system of shelves can easily be designed to fit most anywhere. For instance, if there was no room anywhere else in the house for storage, a sculpture stand could be made on wheels with shelves on one side allowing the unit to be turned against the wall to hide the boxes from view. About the only place this type of box should not be placed is on the floor, especially under a bed. (Artworks should never be stored under a bed.)
Housing Artworks In Gallery Storage Areas
At Valley House, the main storage area is not open to the public like in some galleries. Because of this, the racks are designed for function, not looks.
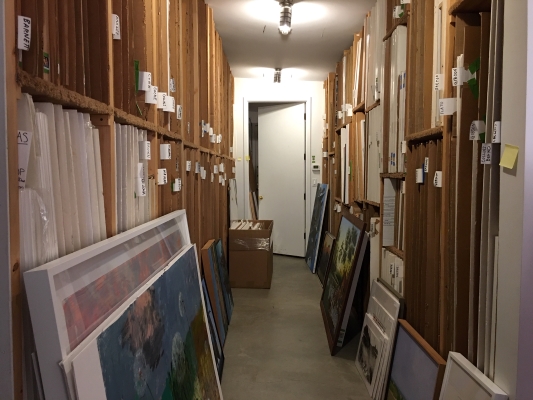
This is one of the artwork storage areas in the gallery that is not open to the public. This particular area handles medium sized artwork.
The racks on this aisle are designed to handle mid-sized artworks. The depth of the rack on the left is 54 inches deep. This depth was accomplished by designing 48 inch deep racks and moving them off the wall by 6 inches. The 54 inch depth was chosen to allow a 48 inch wide painting with a large frame to fit the rack properly. All the separators are 54 inches deep and hit the back wall to keep the artworks properly separated so they don’t scrape against each other when moved in and out. The aisle between the racks is 56 inches wide. This is so that, a painting can be pulled straight out of the rack without being obstructed by the opposing rack.
There are three 2 x 4’s that make up each of this rack’s vertical support sections. Supports are on 24 inch centers so each shelf, made of carpeted 3/4 inch plywood, has 22 1/2 inches of usable space. This narrow shelf width will support most any two dimensional artwork that is placed on it.
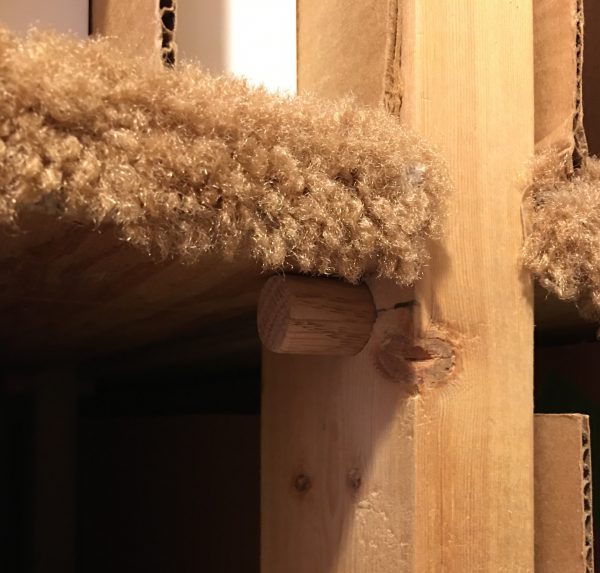
The shelves in this section are held up by one of two types of support. The first is a 1 inch wood dowel that is slipped into a 1 inch hole drilled through the side of each of the shelves’ 2 x 4 supports. It was drilled taking into account the ultimate height of the shelf. Depending on the length of the dowel, it can either go through the 2 x 4 and stop on the other side or stick out on both sides to provide support to the shelf next to it.
This shows how dowels are used to hold shelves in place. In this case, a 1 inch hardwood dowel is inserted through a 2 x 4 support. Although not seen here, the dowel extends through the support to also hold the next shelf in place.
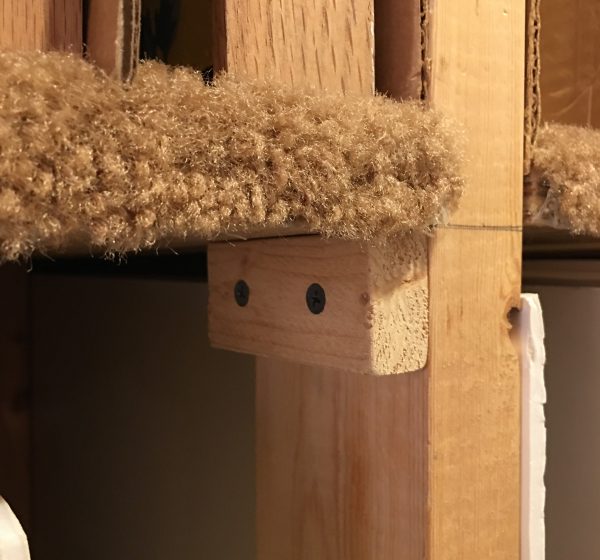
The second type is a 1 x 2 inch stick, cut to the width of the 2 x 4. Here it is drilled with counter sunk pilot holes and then affixed to the support with sheet rock screws at the height needed. A 48 inch long 1 x 2 could have been used instead of the shorter ones if more support was necessary.
A drilled and counter sunk 1 x 2 can also be used to support a shelf.
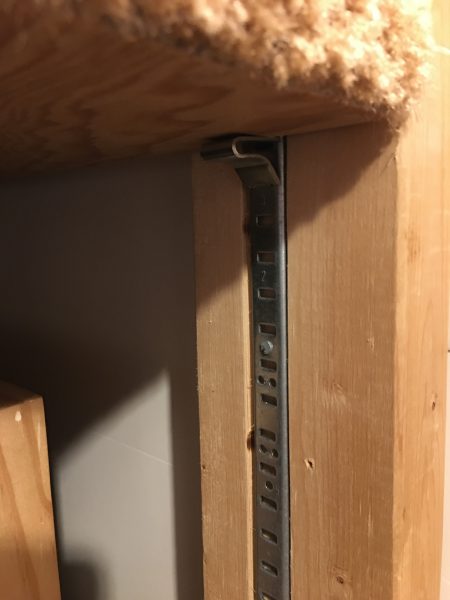
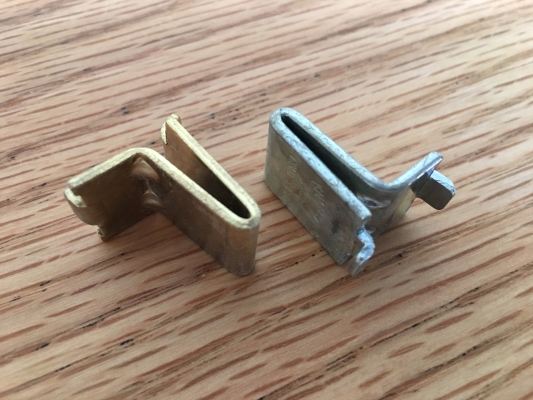
In the same storage space, seen below is a rack designed for smaller scale framed works. The structure is the same as the larger racks but this section is only 30 inches deep. Because the shelves have to support less weight, they are supported with a KV shelf support system.
The 2 x 4 supports have been routed to allow the KV clip rails to be flush with the surface of the 2 x 4. This allows the shelves to properly fit between their supports.
2 x 4 supports were routed so KV clip rails fit flush allowing the shelves to do the same.KV clips
I hope these art storage solutions are helpful and inspire a plan to build proper storage for artworks that are on sabbatical. Long term storage of artworks haphazardly stacked in a closet, or worse, under a bed is asking for trouble.
Following is a List of Things to Think About While You are Planning a Storage System for Your Collection.
Determine if you want on or off-site storage
Determine if you want other people to see your storage area as it may make a difference on how you want the racks finished out.
Determine how much storage you need now and project how much you will need in the future, considering what you are collecting and your collecting history.
Determine if you need climate-controlled storage for what you are collecting; works on paper will need it, but ceramics may not. If you are not sure, consult a conservator in the field you are collecting.
Be sure that the width of the rack you design is, or is less than, 1/2 of the distance to whatever immovable object is in front of it, whether it is another facing rack or a wall.
Be sure that you consider the weight of the artworks you are planning to store and determine if the structure you are designing will support that weight comfortably.
With that in mind, be sure the distance between the vertical supports is not too great when designing your racks. Remember that with every inch of extra distance between the vertical supports their is space for another artwork. This extra weight may cause the shelf to bow and eventually fail. A shelf made from 3/4 inch plywood that is expected to support large glazed artworks should not be any wider than 24 inches. To support really heavy works, there is nothing wrong with laminating two shelves together.
Always use cut pile carpet on a shelf rather than closed loop. The loops can catch on the edges of a frame or cause a wood frame to splinter while an artwork is being slid in or pulled out.
The separators used should be either foam core, fluted cardboard, or pure fluted polypropylene sheet. Acid free fluted cardboard would be a preference over regular but is not always practical. (Be sure to slide artworks slowly back and forth into their rack space. This will help slow what I call “rack rash.”)
It is important that, whatever type is chosen, all separators properly fit the depth and height of the rack. They should minimally stretch from the back of the rack or back stop to the front of the rack in length and be about 1/2 inch below the shelf above it in height. (Please do not use separators that are not the right depth. You may not know when a short separator is not properly protecting the artwork next to it and damage can easily happen when a work is moved in and out.)
It is always a good idea to provide movable shelf supports so they can be moved when wanted. However, it is my experience that once you have established heights for each shelf and have cut separators to the proper size, you will most likely not move the shelf heights again.
 Documenting Your Art Collection
 Documenting Your Art Collection
 How Do I Get My Art Appraised?
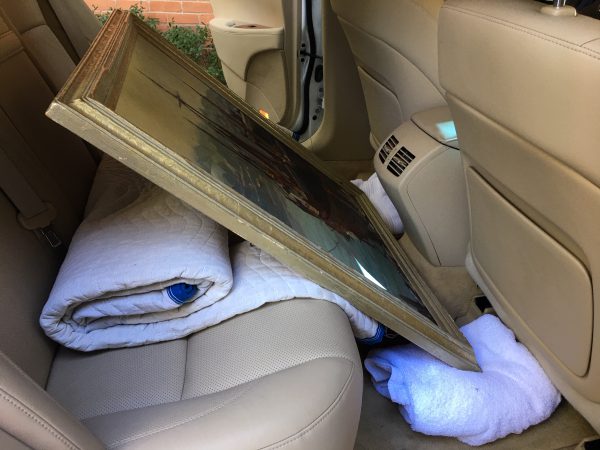 Practical Tips for Safely Transporting Artwork
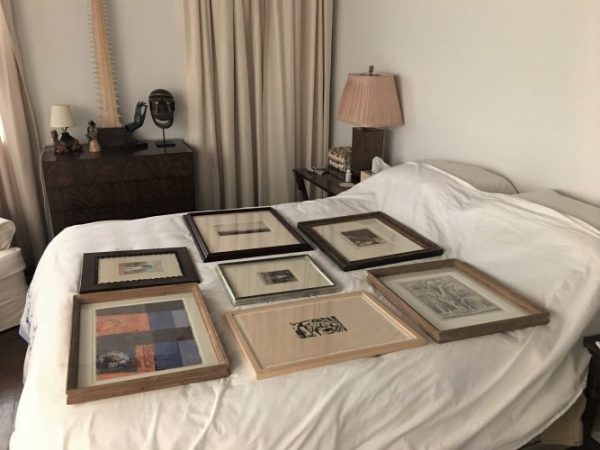 Temporarily Storing Artwork: A Case Study
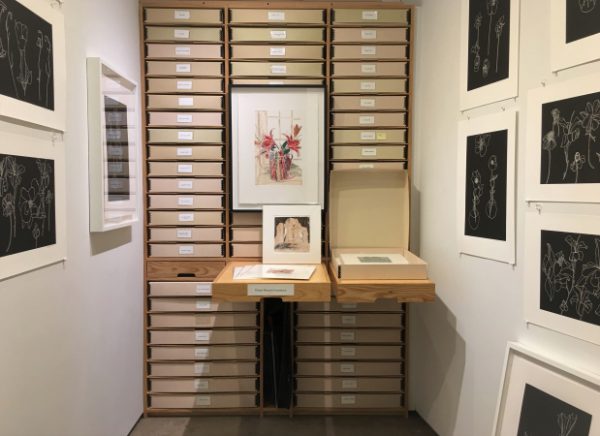 Four Artwork Storage Solutions
 Hanging and Framing FAQ’s
 Siting Sculpture, Part One: Overview
 Siting Sculpture: Part Two, A Case Study
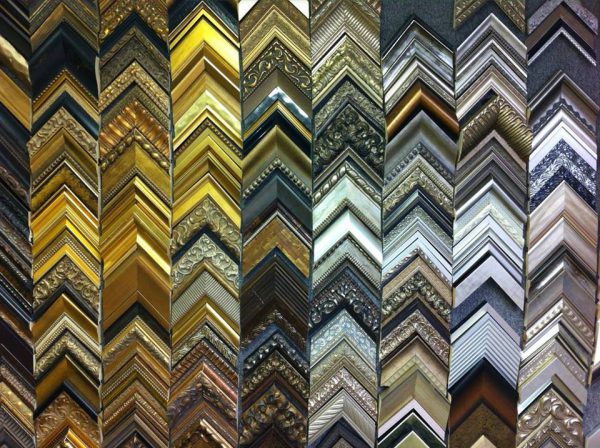 The Importance of a Proper Frame
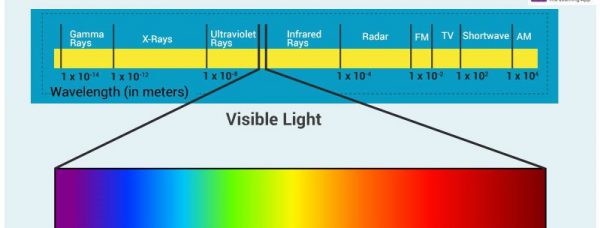 When to Use UV Control Glazing
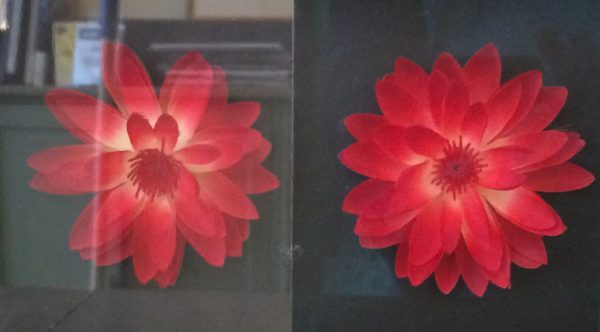 Reflection on the Problem of Reflections
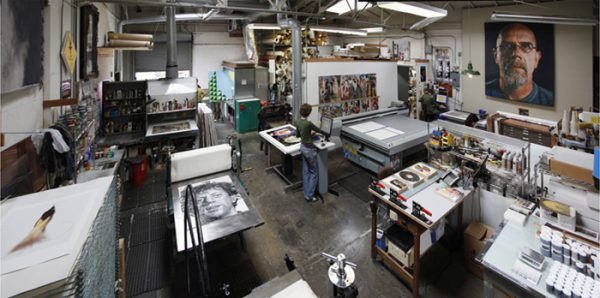 The Value in Fine and Reproductive Prints
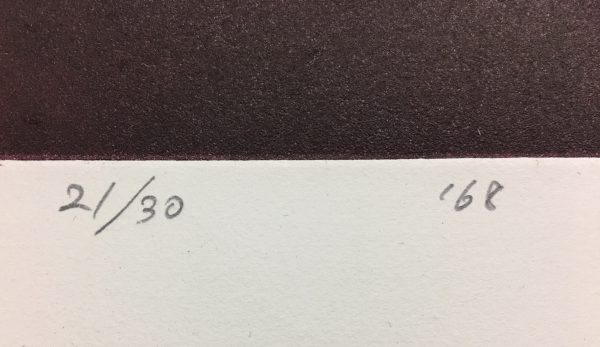 What Does That Fraction Mean on a Fine Print?